
The roster is where you schedule your team. Shift scheduling is available on the Professional plan and up. Offering shifts out and generating a roster from preferences need Shift Automation (Business plan and up), which your admin switches on under Settings › Working Time › Modules.
Open the menu under your name and choose Shift Scheduling. Admins also find it under Scheduling › Shift Schedule.
1. Create shift templates
Templates are your regular shifts, such as Early, Late or Night. You can assign a shift without one, but templates save time and keep everyone's hours the same.
Open Templates
On the roster, choose Templates, then New Template.
Fill in the shift
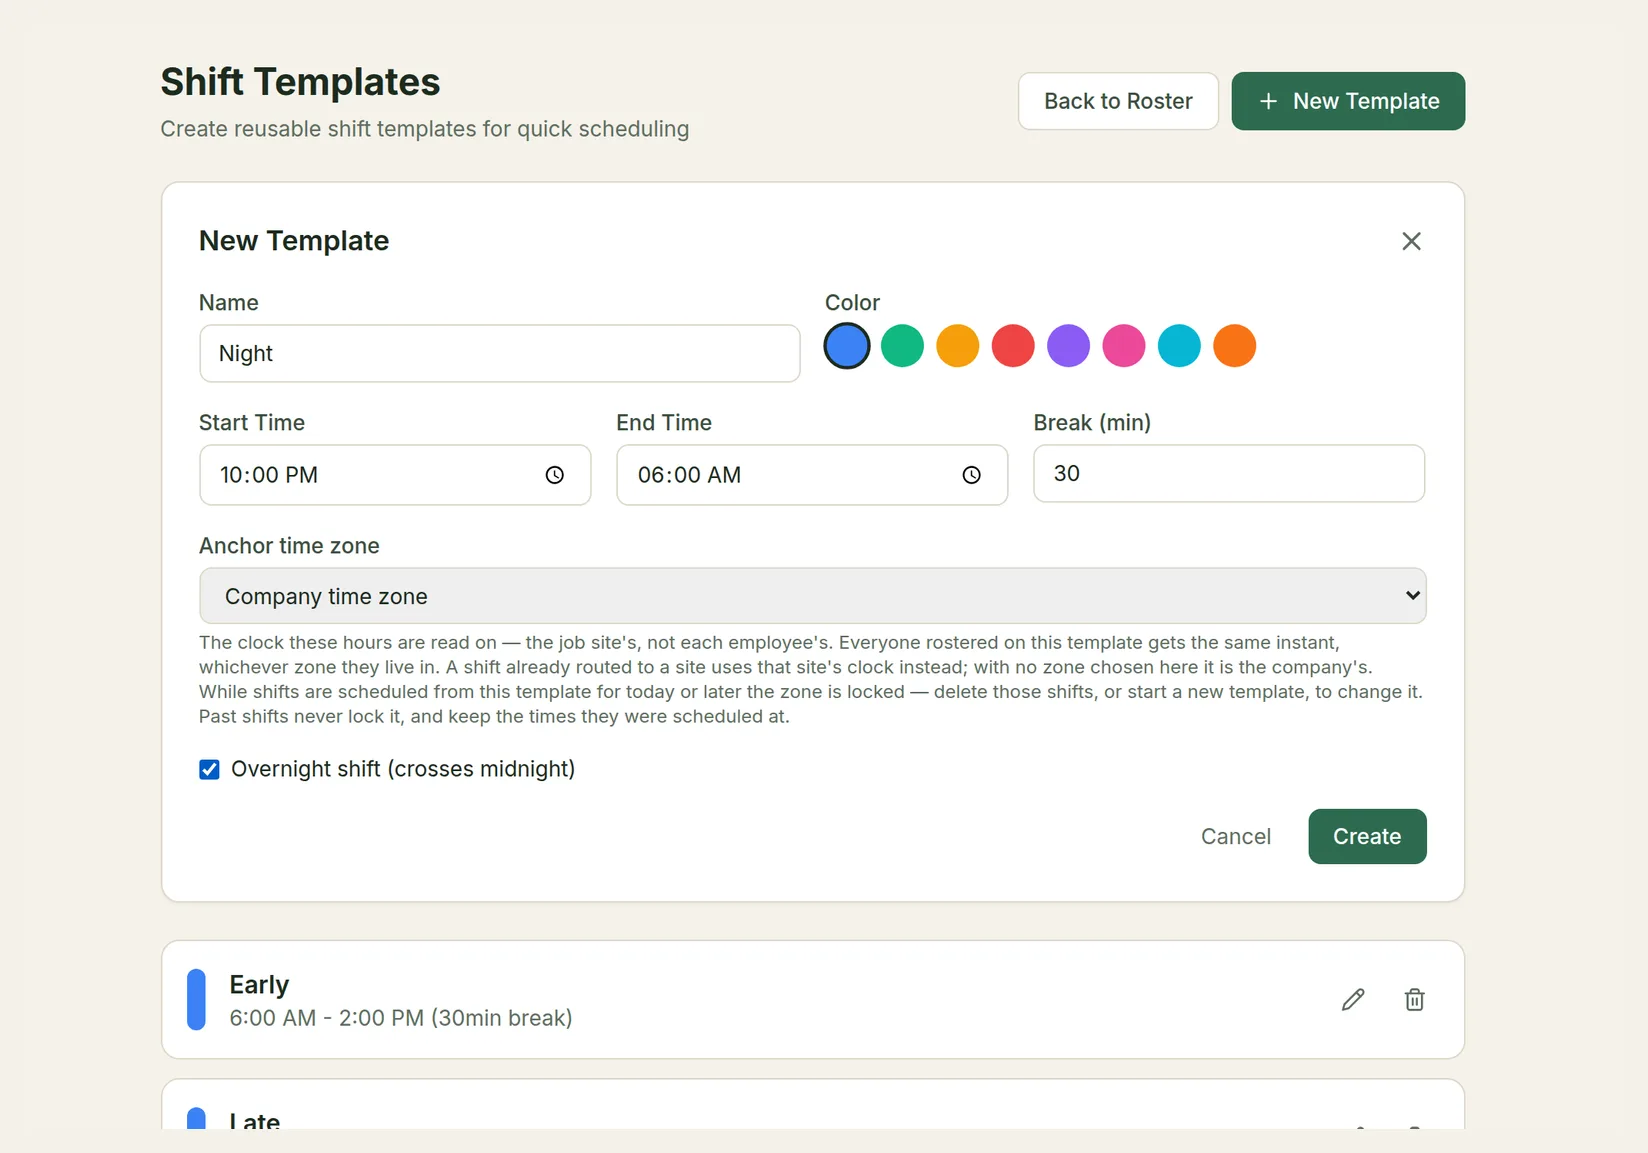
Give it a Name and a Color, and set the Start Time, End Time and Break (min). Tick Overnight shift (crosses midnight) for a shift that ends the next day.
Choose the anchor time zone
Anchor time zone is the clock the template's hours are read on. Leave it on Company time zone, or pick the zone of the site where the shift is worked. Everyone on the template works the same moment, whichever zone they live in: a 9:00 shift anchored in New York is 9:00 in New York, and 7:00 for someone whose own profile is in Denver.
Create
Choose Create. To change a template later, use its pencil icon.
When you edit a template you can also set Required roles: how many people with each role the shift needs each day. Gaps show as warnings on the roster but never block scheduling. Roles themselves are set up by an admin under Scheduling › Shift Roles.
The anchor time zone is locked while shifts from the template are scheduled for today or later. To change it, delete those shifts or create a new template. Past shifts keep the times they were scheduled at.
2. Assign shifts on the weekly roster
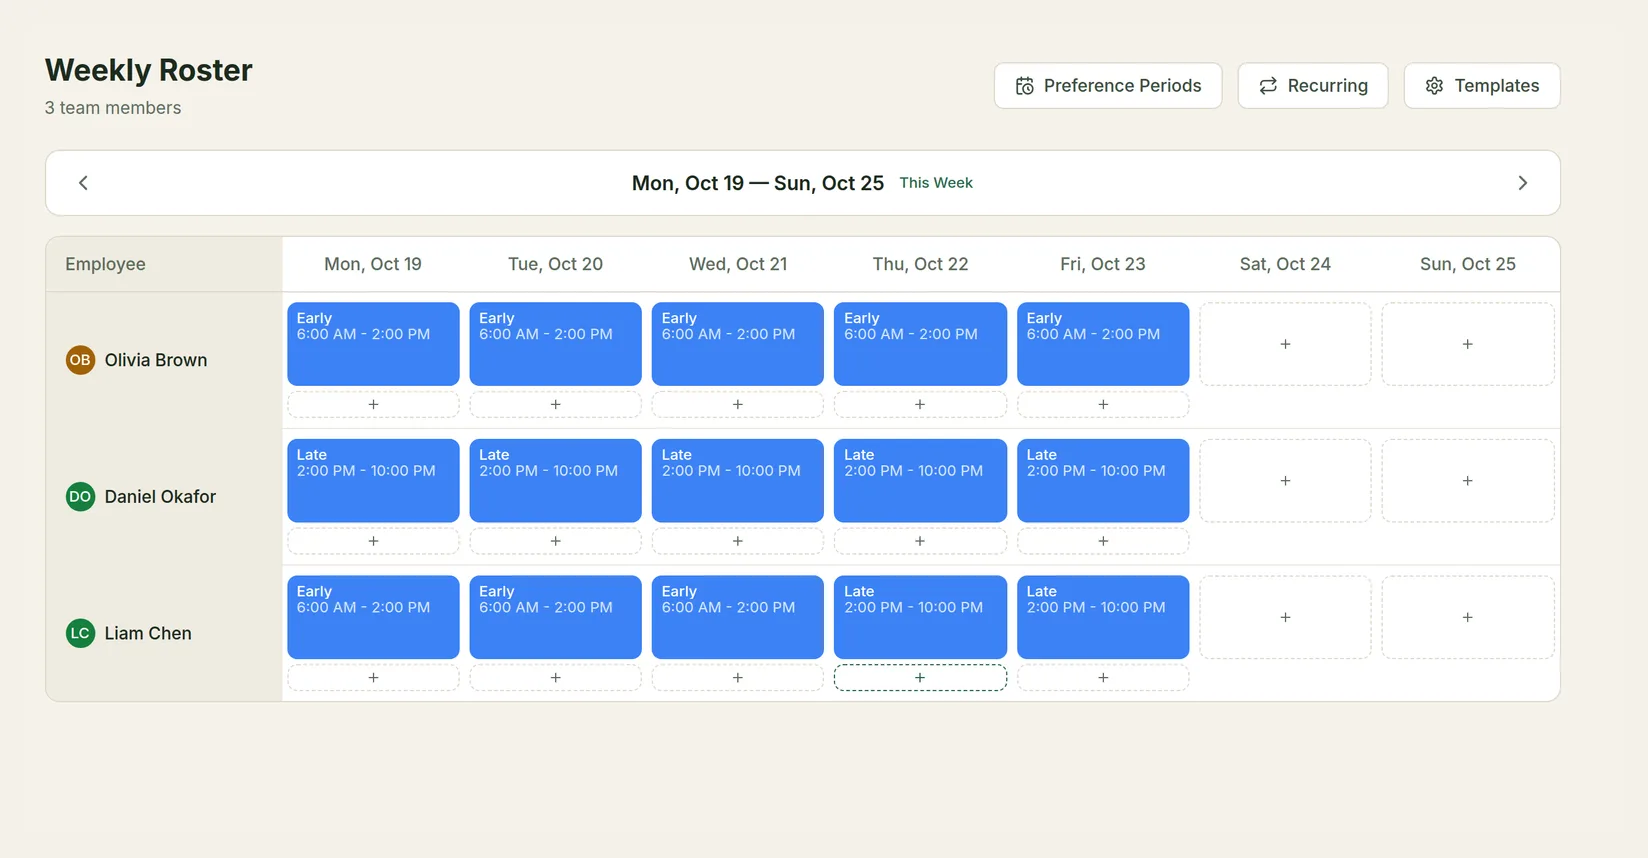
The Weekly Roster shows one row per team member and one column per day. Use the arrows to change week, and This Week to come back.
Choose + in a cell
Choose + in the person's row under the day.
Pick a template or custom times
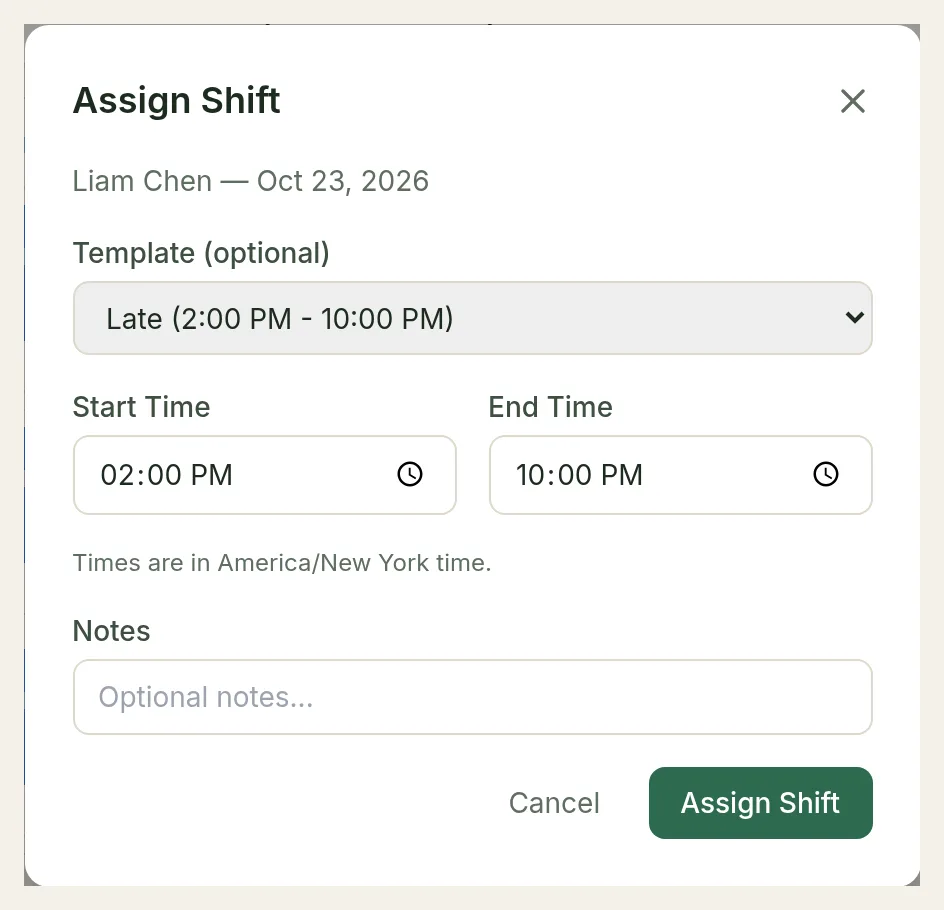
In Assign Shift, choose a Template (optional) to fill in its times, or Ad-hoc (custom times) and set the Start Time and End Time yourself.
If your company uses shift roles, choose a Role (optional). Roles the person holds are listed under Qualified; others are under Not qualified (requires confirmation).
Check the time zone and assign
The line under the times, for example Times are in America/New York time., says which clock the times are on. For a template it's the template's anchor zone; for custom times it's the employee's own zone. Add Notes if you like and choose Assign Shift.
The employee is told about the new shift in TimeLeaf and by email. To remove a shift, choose the × on it.
Cells also show On leave or Restricted when someone has approved leave or a work restriction that day, so you can see it before you assign. You can still assign them; TimeLeaf asks you to confirm.
When TimeLeaf warns you
Before saving, TimeLeaf checks the shift against your company's rules. If any apply, it shows a list of everything in the way and asks Assign anyway? For example:
- Employee is on approved leave on this date
- Employee does not hold this shift role
- This shift leaves less than 11h rest either side of another shift
- This shift takes the employee past their contracted hours, past an average weekly working-time limit, or past the legal daily maximum
- This shift leaves the employee without their minimum weekly rest
- This shift breaks the night work limits for this employee
- A work restriction applies to this employee for this shift (the reason is never shown to you here)
Choose OK to assign anyway, or Cancel to change nothing. Your override covers only the warnings in that list, and it's recorded in the audit log. If something new comes up in the meantime, TimeLeaf asks again.
TimeLeaf never lets you put someone on two overlapping shifts they would actually work. The one exception: a shift of theirs that is out to offer. That one is listed as a warning you can override.
Which rules apply depends on how your admin set up overtime and working-time policies. See Shift Scheduling and Overtime & Time Bank.
3. Fill vacant shifts
Shifts with nobody on them appear in an Unfilled row, and the roster header shows how many vacant shifts there are. A vacant shift appears when someone's approved leave frees it up, or when a generated roster couldn't fill a slot.
- Assign opens Assign Vacant Shift. Choose the Employee and Assign Shift. The same checks and warnings apply.
- Offer out offers the shift to eligible employees (Shift Automation only). They answer from their dashboard or the email, and the shift goes to whoever accepts. TimeLeaf tells you if anyone was left out and why, for example because they're on leave or would get too little rest.
4. Set up recurring shifts
For someone who works the same shift every week, choose Recurring, then New Pattern. Choose the Employee, the Shift (template), the Days, when it Starts and, optionally, when it Ends. Choose Create & generate.
TimeLeaf adds the shifts a few weeks ahead and keeps rolling forward every day. Each pattern shows whether it is Running, Paused or Ended, and you can pause, resume, edit or delete it. Edits apply only to days not yet added: shifts already on the roster stay until you change them there. Days the person can't work, for example because they're on approved leave, are skipped. When you save, TimeLeaf says how many shifts it added and lists anything it skipped.
5. Generate a roster from preferences
With Shift Automation, you can collect your team's shift preferences and let TimeLeaf draft the roster.
Create a preference period
Choose Preference Periods, then New Period. Enter a Period Name, the Schedule Start and Schedule End (the dates the roster covers), when Submissions Open and the Submission Deadline. Choose Create.
Let your team submit
Employees rank their preferred shifts for each day. The period page shows who has submitted and who hasn't. TimeLeaf reminds them about a day before the deadline.
Close and generate
Choose Close Submissions, then Generate Roster. Generation runs in the background; refresh after a moment.
Preview and publish
Choose Preview Roster to check it. Slots TimeLeaf couldn't fill show as Unfilled, and people it couldn't roster are listed with the reason. When it looks right, choose Publish Roster.
Until you publish, generated shifts are drafts: you see them on the roster, with a reminder of how many are not yet published, but your employees don't. Publishing shows them their shifts and sends each person one notice, in the app and by email.
How TimeLeaf weighs preferences, seniority and fairness is set by an admin under Scheduling › Shift Rules.
The Today view
If your company uses job sites, the roster also has Week / Today and By crew / By site switches. Today shows who has arrived at each site, based on check-ins at the shift's stops.