
This guide takes you from an empty workspace to a live one that your employees use every day. It follows the same order as the Onboarding wizard inside TimeLeaf, so you can keep both open side by side. Plan for about 30 minutes.
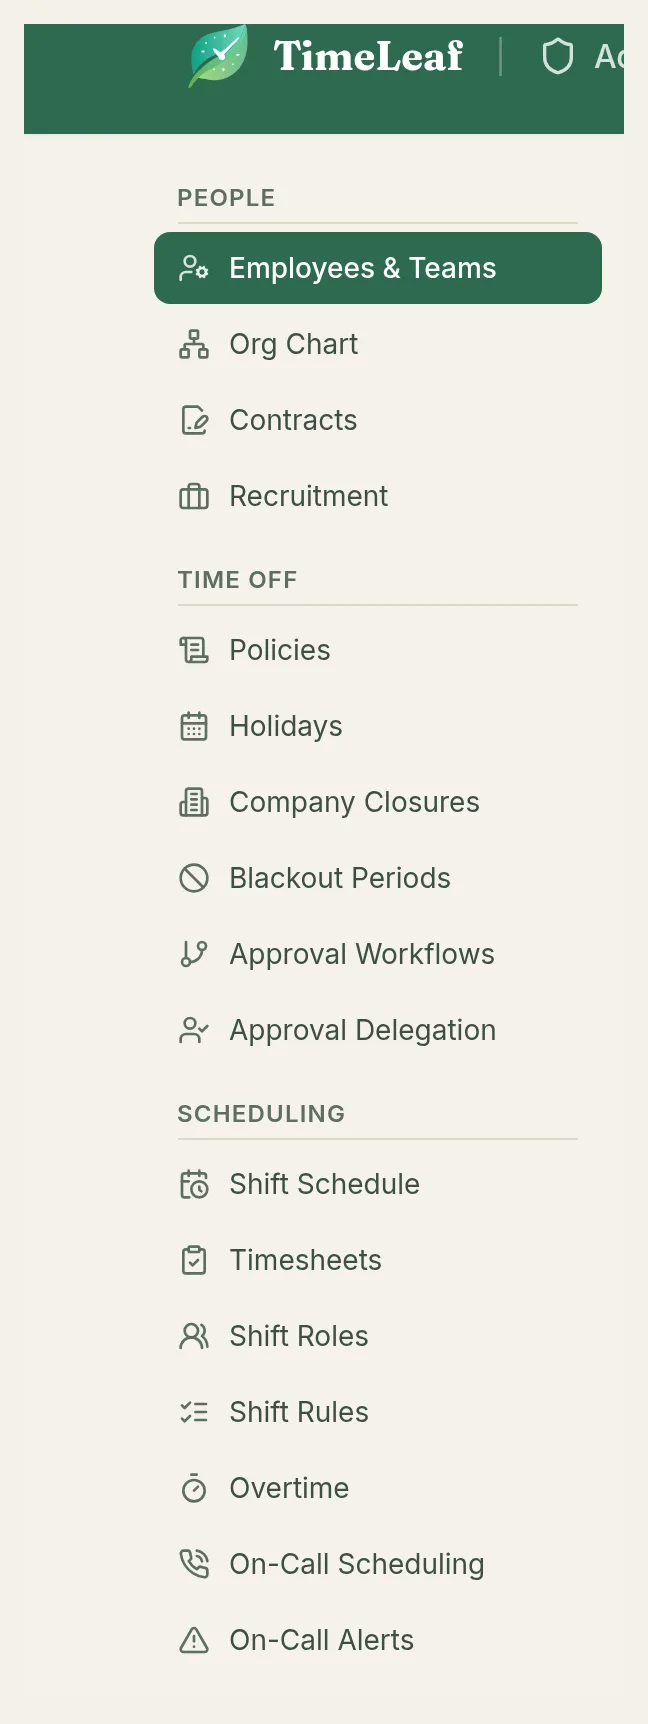
You need to be an Admin or the Owner. The person who signed up is the Owner. Everything below happens in the admin menu on the left. If you don't see it, open the user menu (top right) and choose Employees & Teams.
The Onboarding wizard
The first time you sign in, TimeLeaf opens Settings → Onboarding for you. The wizard has seven steps: Company, Location, Holidays, Time off, Overtime, Team and Go live.
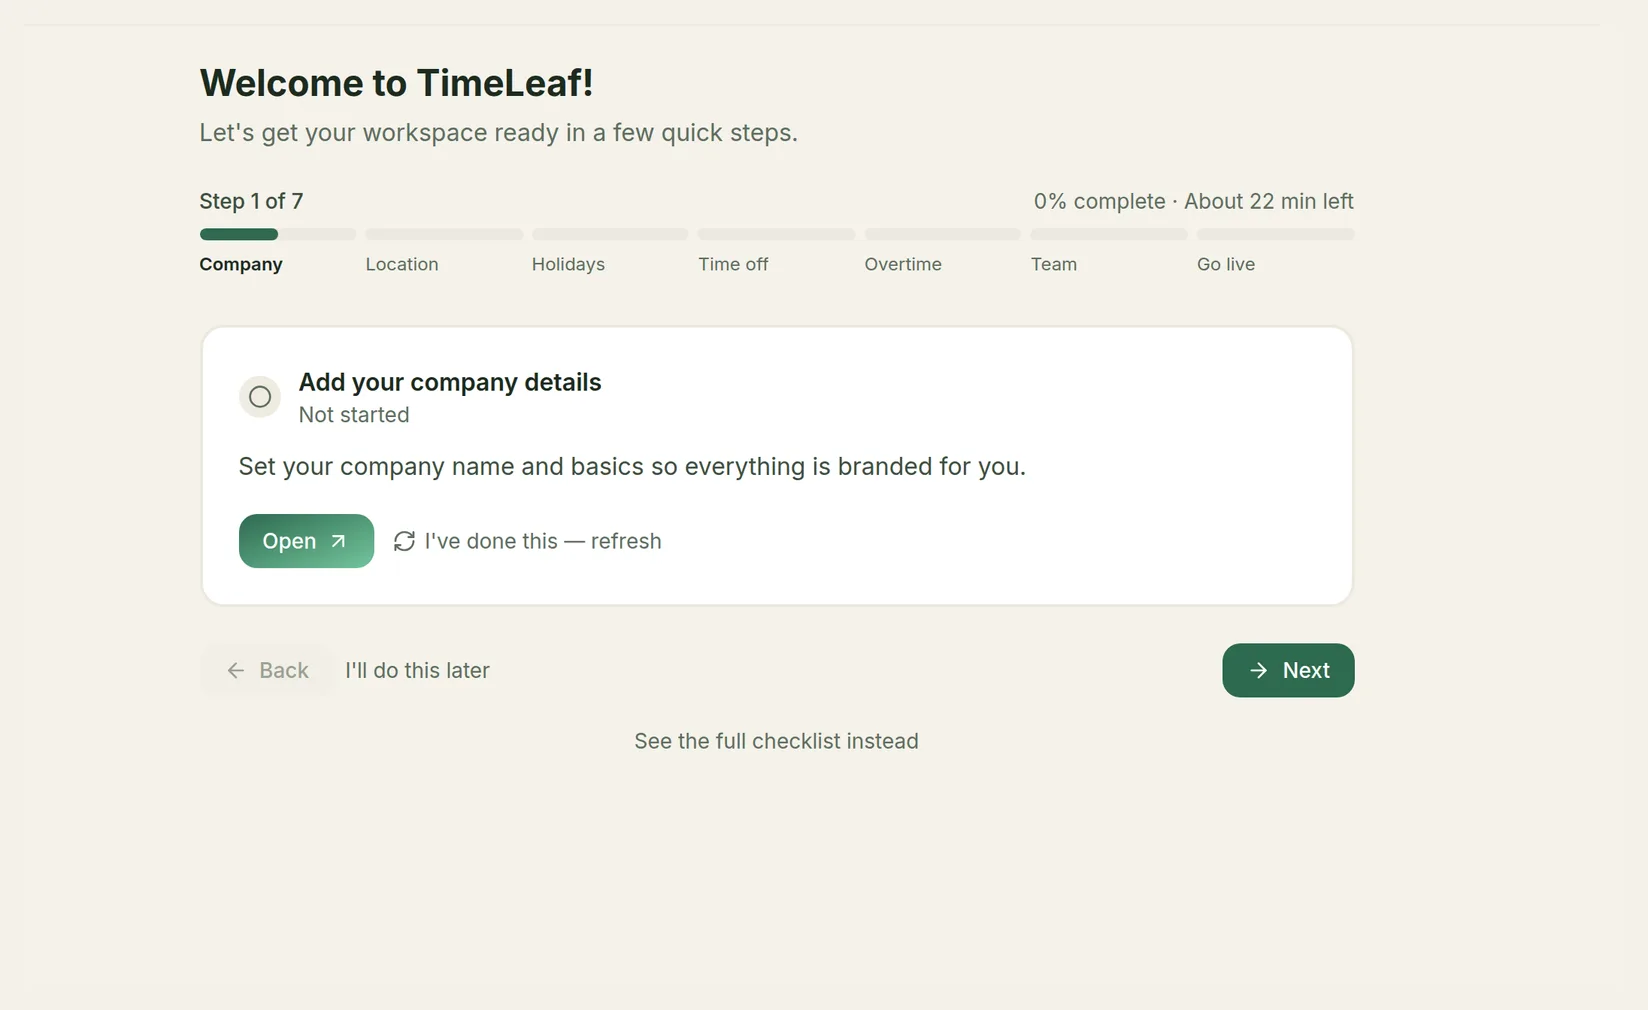
How each step works:
- Click Open. The admin page for that step opens in a new browser tab.
- Do the setup there and save.
- Come back to the wizard tab and click I've done this — refresh. The step shows as done.
- Click Next.
You can leave at any point:
- I'll do this later closes the wizard. You won't be sent back to it automatically. Open Settings → Onboarding whenever you want to carry on — it then shows the full checklist.
- See the full checklist instead shows every step at once, with a Review or Open link on each.
The sections below cover each step in order, then the extra work that turns a configured workspace into one people actually use.
Step 1: Company details and jurisdiction
Fill in your company profile
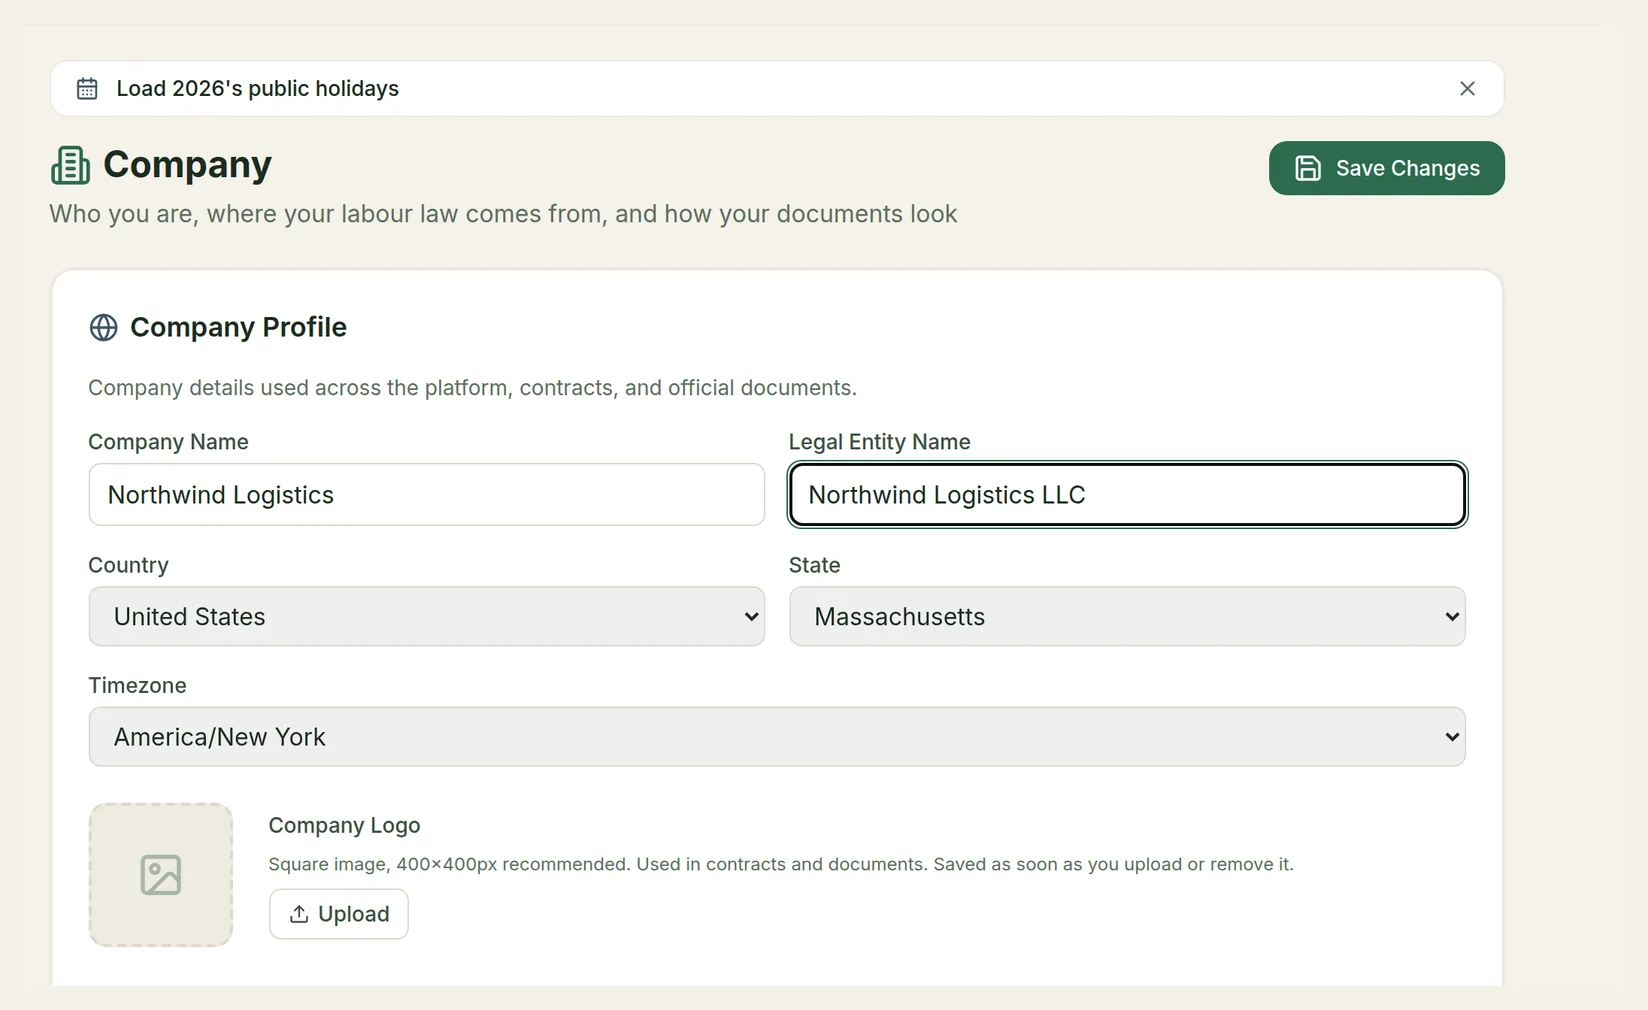
Go to Settings → Company. In Company Profile, enter:
- Company Name — shown across the app and in emails.
- Legal Entity Name, Registration / EIN Number, phone, address and website — used on contracts and documents.
- Country, State and Timezone — the timezone is the company's clock. It decides what "today" is for accruals, holidays, reports and the daily background jobs.
- Company Logo — click Upload. The logo saves straight away; everything else saves with Save Changes.
Pick your jurisdiction
Scroll to Jurisdiction, Fiscal Year & Brand:
- Jurisdiction — the labour law your setup follows: United States, United Kingdom, Canada (Ontario), Australia, Germany, or Generic / Other. It decides which recommended time-off policies and which recommended overtime policy TimeLeaf offers you in the next steps, and which country's public holidays it suggests first. It doesn't change anything you have already set up. If you leave it unset, TimeLeaf goes by the company Country above.
- Fiscal Year Start — the month and day your leave year starts, as
MM-DD(for example01-01for a calendar year). It anchors annual accrual and report periods. - Brand Colour — a hex colour such as
#2563eb, used on contracts and employee-facing documents.
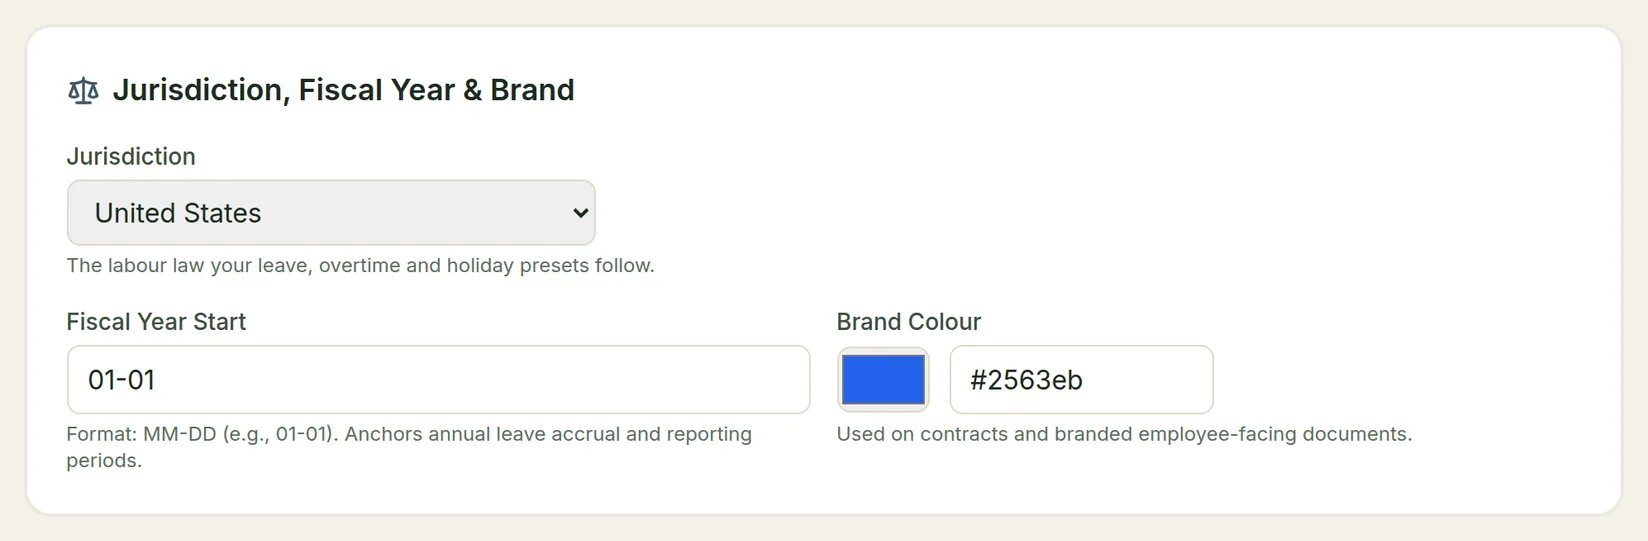
Click Save Changes.
Go live needs all three: a company name, a company timezone and a jurisdiction. The final check refuses to launch without them.
Step 2: Locations
A location is an office, yard or depot where people are based. Locations decide which public holidays apply to whom, and which timezone an employee's day runs on.
Add your first location
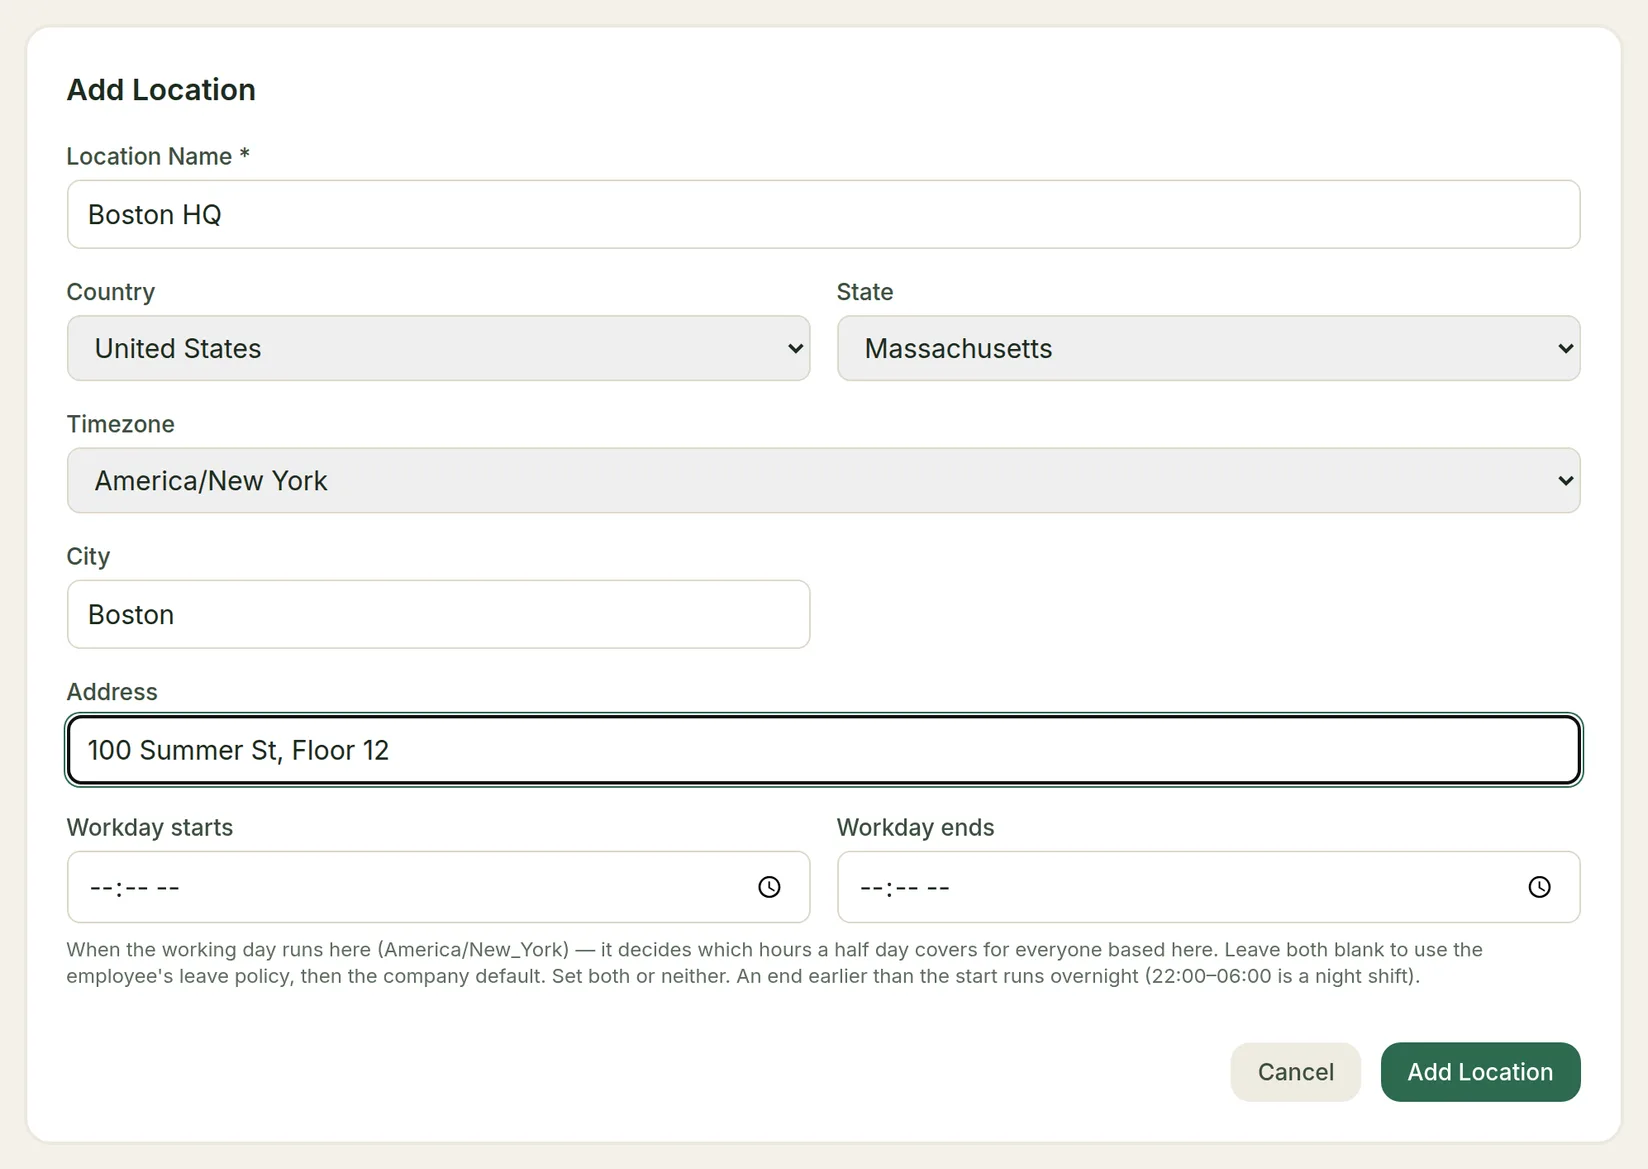
Go to Settings → Locations and click Add Location. Fill in:
- Location Name (required), for example "Boston HQ".
- Country, State and Timezone.
- City and Address (optional).
- Workday starts / Workday ends (optional) — the working day at this site. TimeLeaf uses it to decide which hours a half day covers for people based here. Leave both blank to fall back to the leave policy's hours, then the company default.
Click Add Location.
Add your other sites
Repeat for each office. You can also bring in a list with Import. The list shows each location's country, city, timezone and status.
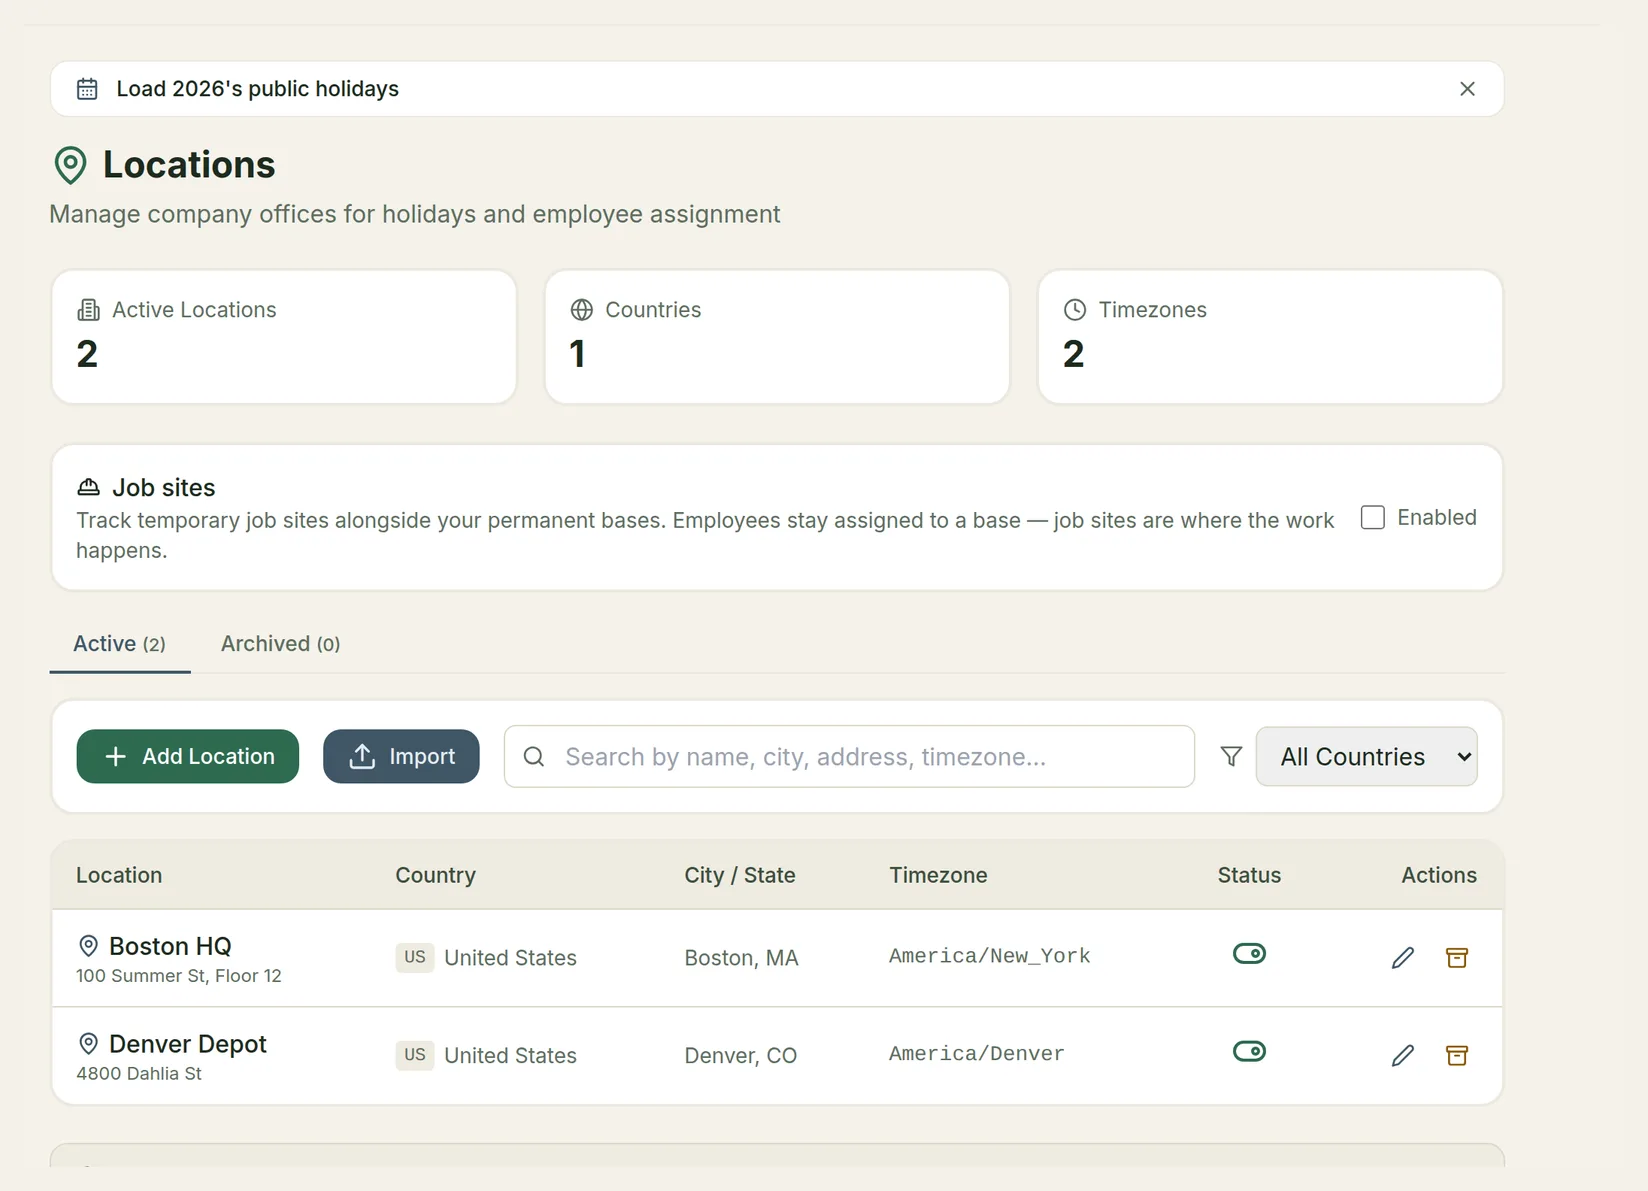
Job sites (Professional and above) are temporary places where crews work for a single job, such as a customer's premises. Tick Enabled on the Job sites card if you need them. Employees always stay assigned to a base location; job sites are where shifts happen. You can skip this for now.
Step 3: Public holidays
Without holidays, every bank holiday counts as a normal working day — so leave booked across one would use up a day of someone's balance.
Load your country's public holidays
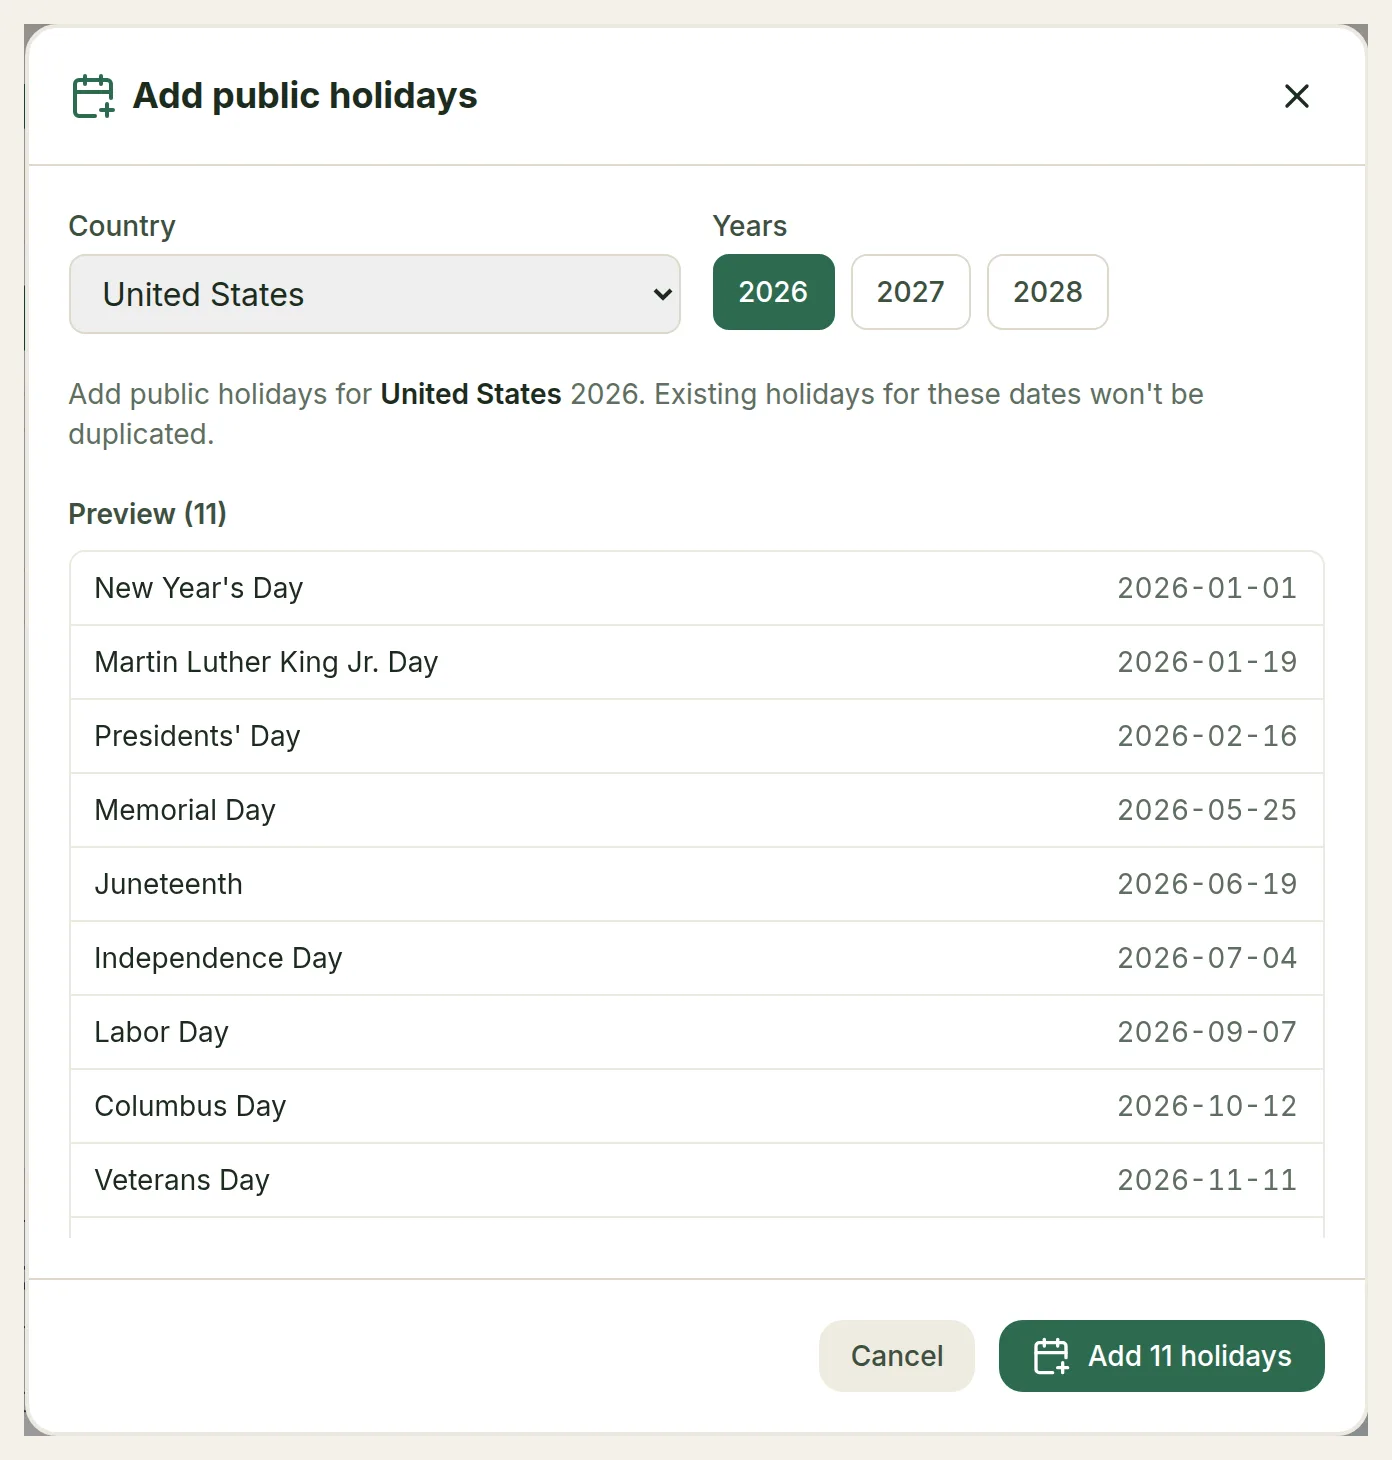
Go to Time off → Holidays and click Add Public Holidays. In the dialog:
- Pick the Country (United States, United Kingdom, Canada, Australia or Germany).
- Pick one or more Years.
- Check the Preview list.
- Click Add N holidays.
Holidays that already exist for those dates are not duplicated.
Add your own days and check the list
Use Add Holiday for company-specific days. A holiday can apply to everyone, to some countries, or to one location only (for example a state holiday for one office). Tick Recurring annually for days with a fixed date. Import loads holidays from a CSV or Excel file, and Copy all to copies a whole year forward.
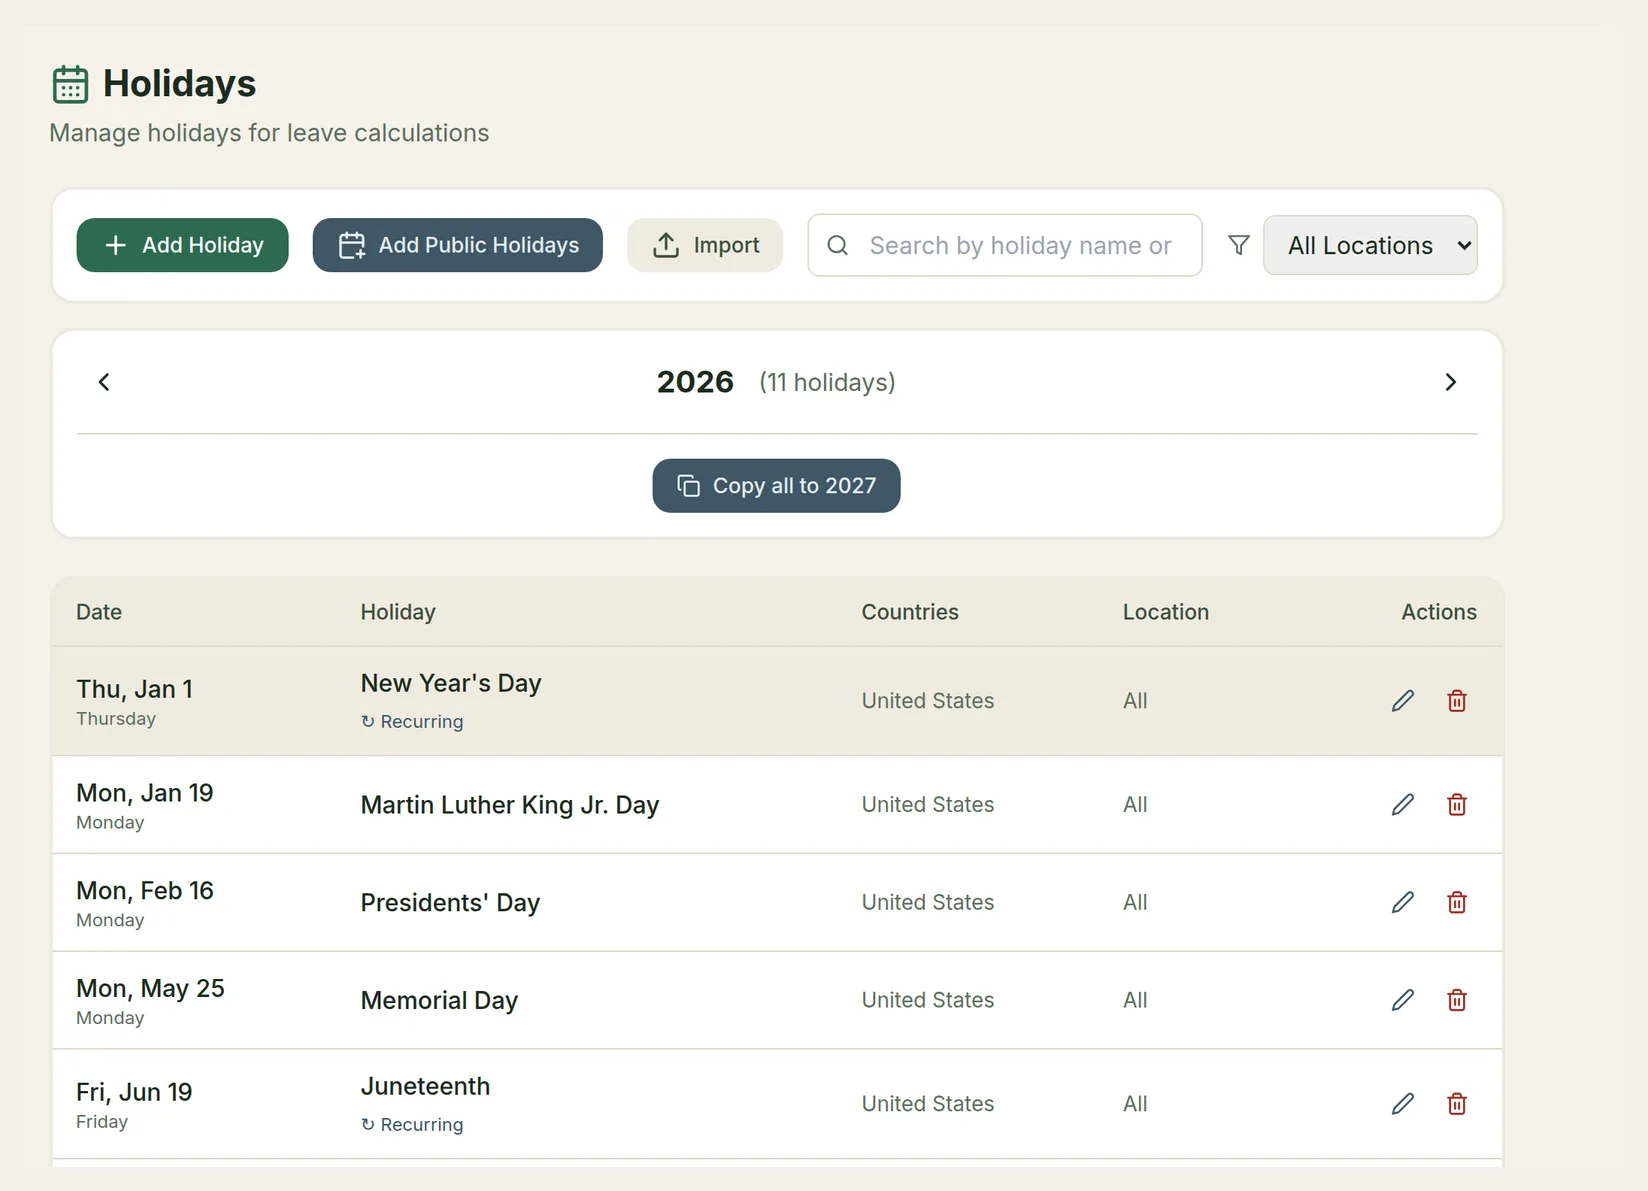
If you have employees in several countries, load each country's holidays. An employee gets the holidays for their location's country, plus any holiday with no country or location set.
Step 4: Time-off policies
A policy is one kind of leave with its own rules — for example "Vacation" or "Sick Leave". You need at least one before anyone can request time off. There are two ways to create them.
Option A: start from the standard set
Apply the recommended policies
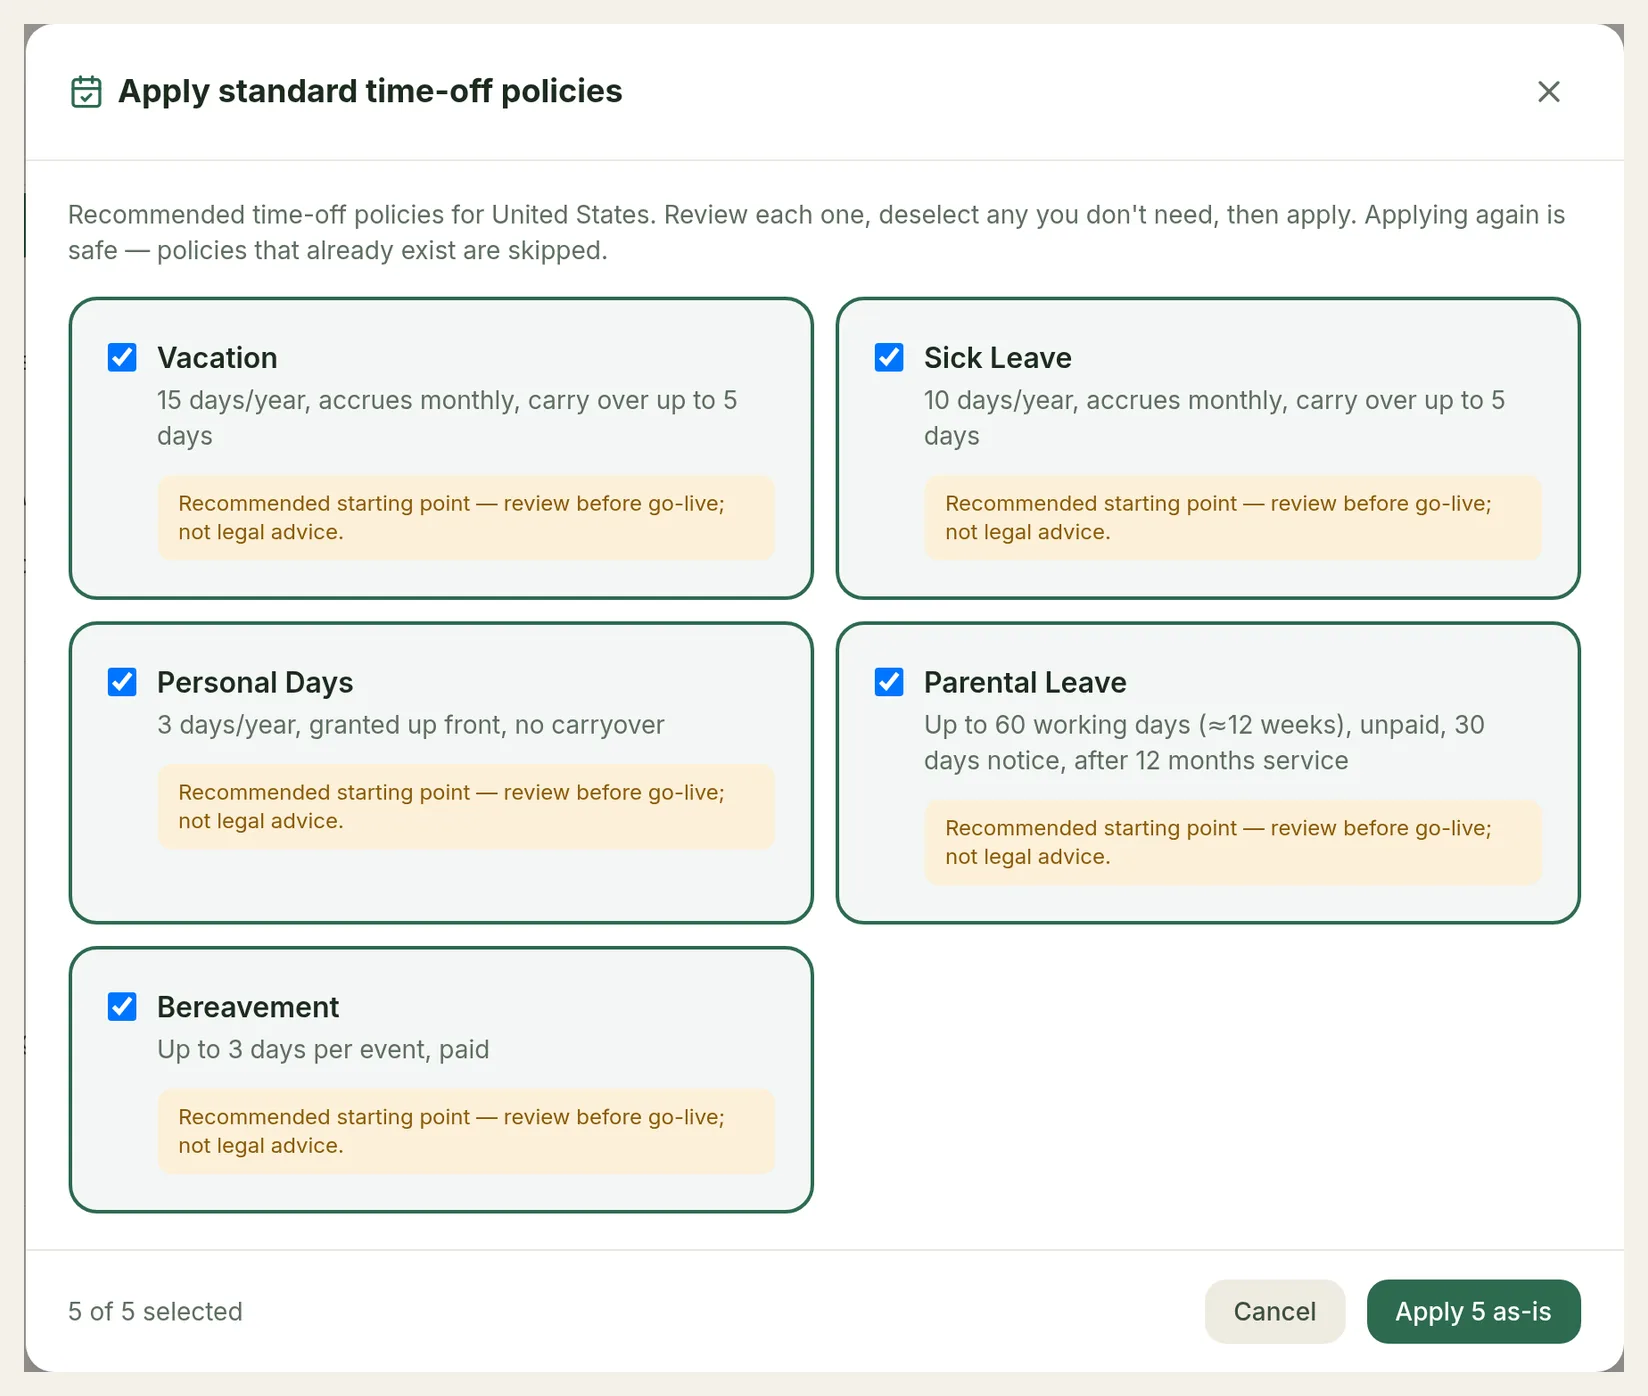
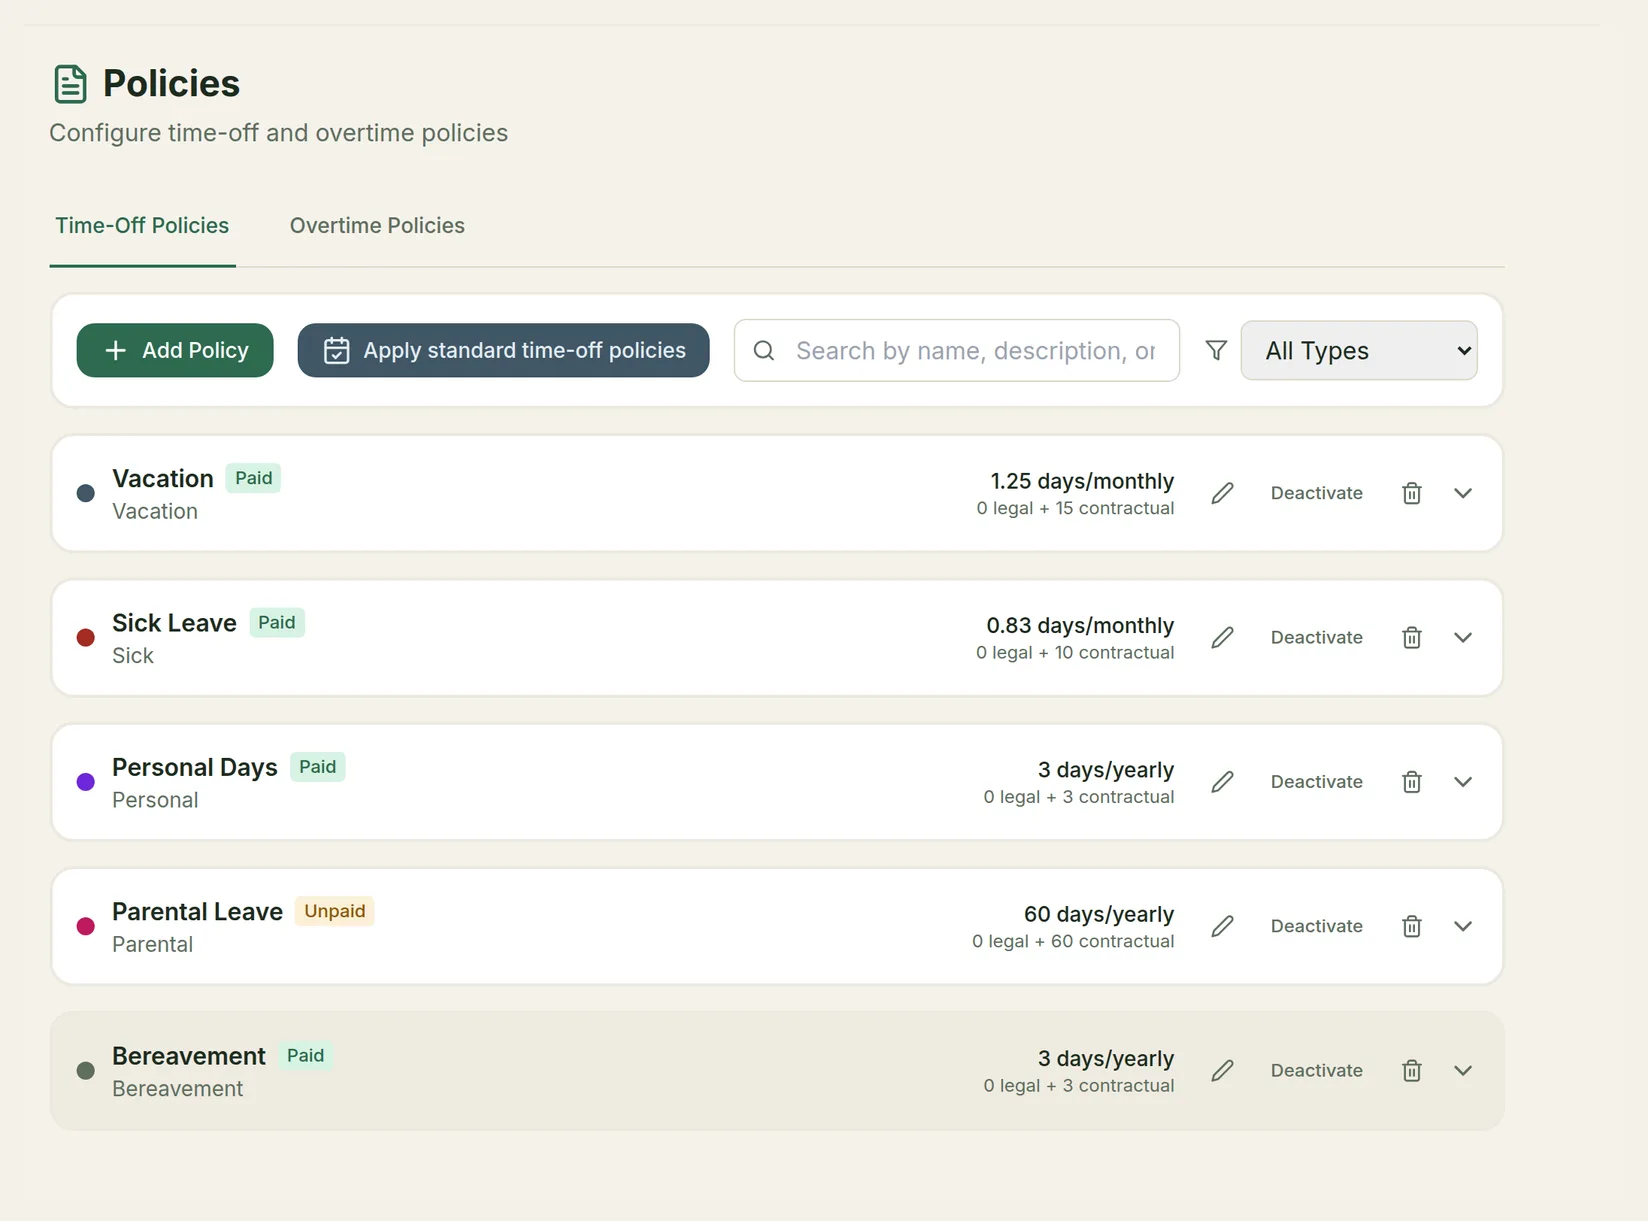
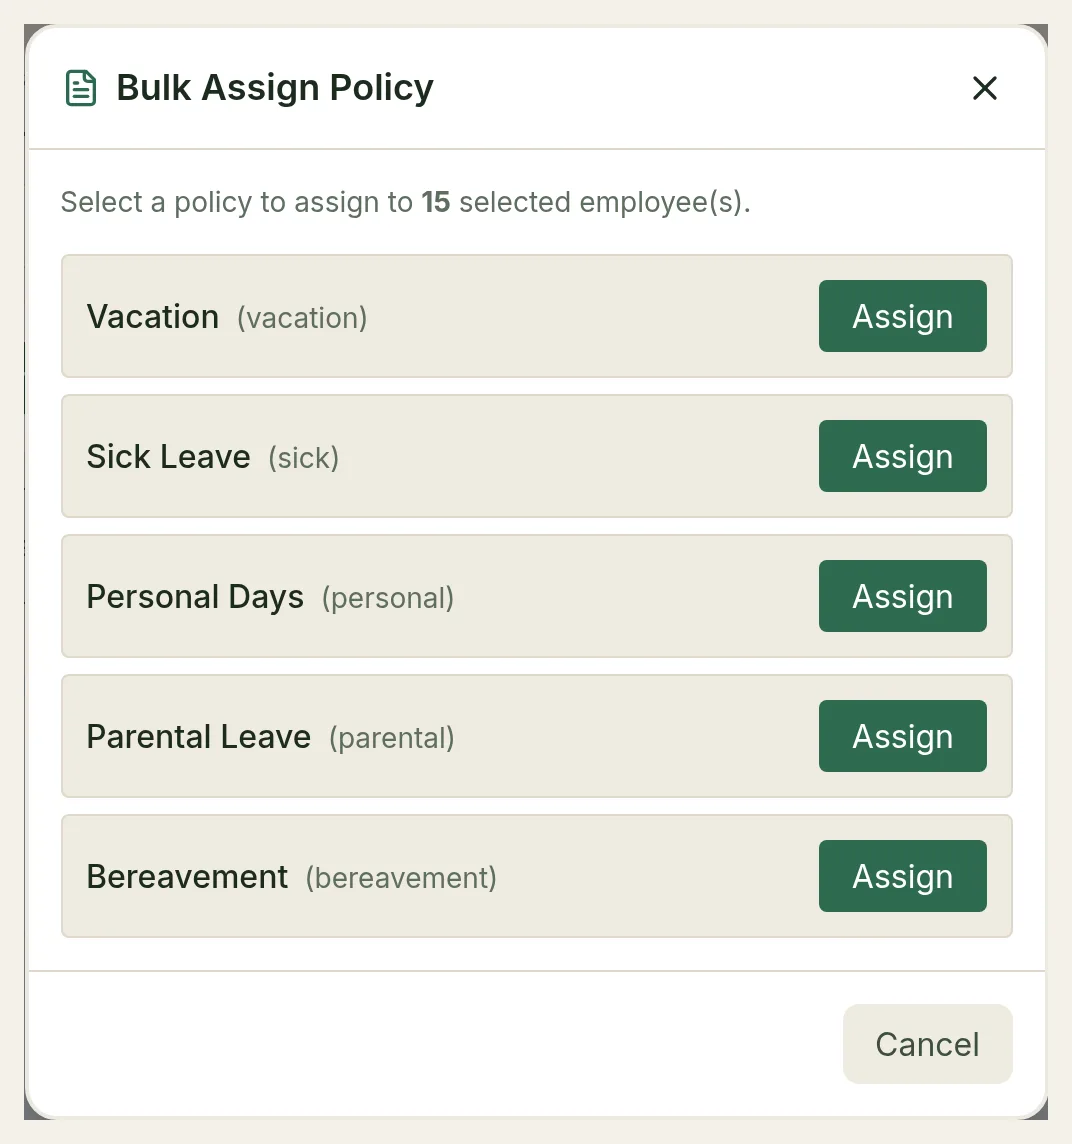
Go to Time off → Policies and click Apply standard time-off policies. TimeLeaf shows recommended policies for your jurisdiction — for the United States: Vacation, Sick Leave, Personal Days, Parental Leave and Bereavement.
Untick any you don't want, then click Apply N as-is. Applying again later is safe: policies that already exist are skipped.
Review each one
Each preset is a starting point, not legal advice. Click a policy in the list to edit it and match it to your own rules.
Option B: build a custom policy
Click Add Policy. The most important fields are:
| Field | What it does |
|---|---|
| Policy Name / Leave Type | The name people see, and the kind of leave: Vacation, Sick Leave, Personal Days, Parental Leave, Bereavement or Other. |
| Compensation | Paid or Unpaid. Payroll exports use this. |
| Accrual Method | Gradual Accrual — days build up each period. Fiscal Year Start — the whole year's days are available on the first day of the leave year. |
| Accrual Rate / Accrual Period | For gradual accrual: days earned per period, and the period (Weekly, Bi-weekly, Monthly or Quarterly). The rate is worked out for you from the entitlement. |
| Annual Entitlement | Legal Requirement (the statutory minimum) plus Contractual Benefit (anything extra you give). Their sum is the Total Max Balance. |
| Carryover Limit | How many unused days can roll into next year. |
| Carried Days Expire On | A date each year when carried-over days that haven't been used lapse, or Never. |
| Min Notice Days | How far ahead people must book. What happens with shorter notice is set in Settings → Working Time (see below). |
| Qualifying Period | Days of service, counted from the hire date, before leave starts to accrue. |
| Work Hours/Day | Length of a working day for this policy. Leave empty to use the company default. |
| Allow Half-Day Requests | Lets people book half days. |
| Allow Hourly Requests | Lets people book part of a day in hours (up to one working day). |
| Work Days / Exclude company holidays from leave calculations | Which weekdays use up leave, and whether holidays are skipped when counting days. |
| Requires Manager Approval | When off, requests of this type are approved automatically. |
| Copy HR on leave events | Emails your HR address (set in Settings → Working Time) about requests of this type. |
| Allow Negative Balance | Lets people book more than they have, with options for what happens at year end and whether such a request still goes to the manager. |
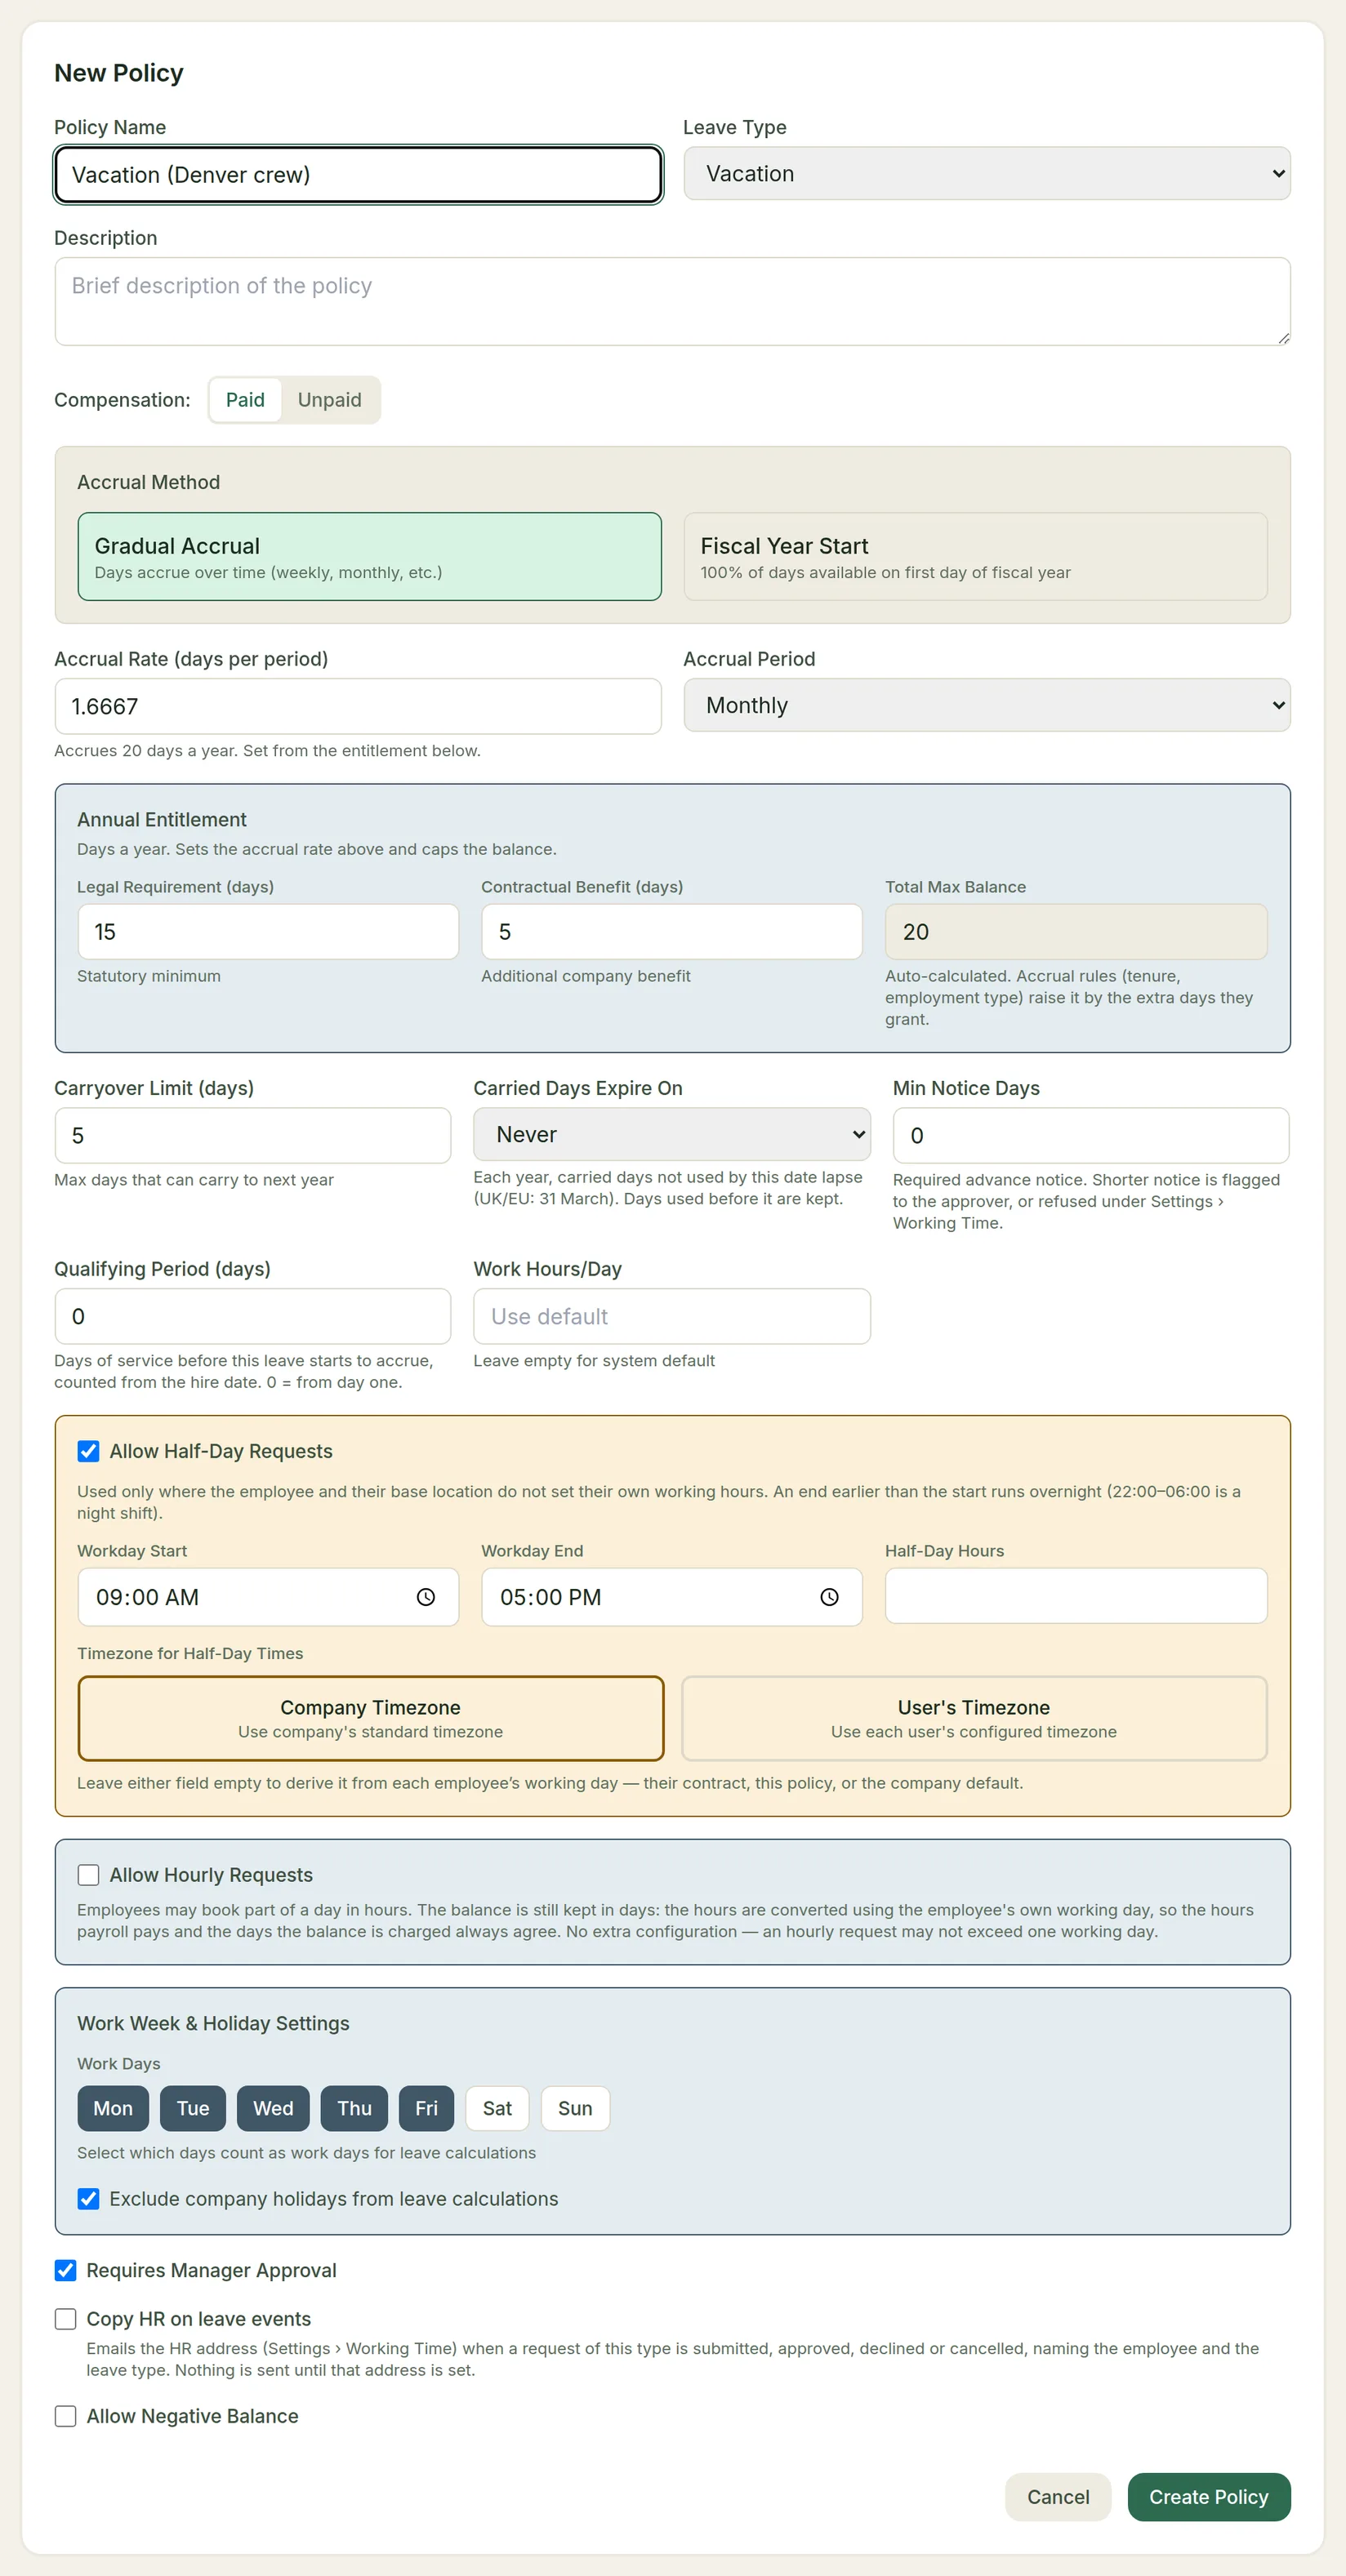
Click Create Policy. For the full detail on every field, see Leave Policies.
Step 5: Default overtime policy
The default overtime policy holds the overtime and working-time rules that apply to everyone, unless a more specific policy covers them. The wizard marks this step as optional, but the final Go live check needs it.
Apply the recommended overtime policy
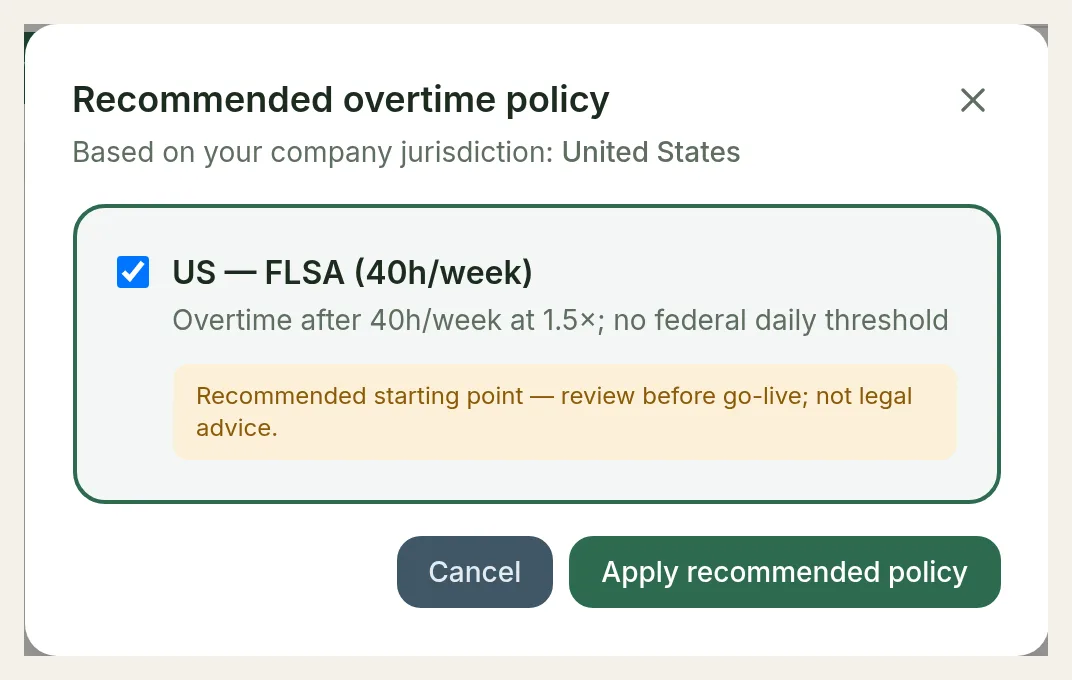
Go to Time off → Policies and open the Overtime Policies tab. Click Use a recommended overtime policy. TimeLeaf shows the policy for your jurisdiction — for example US — FLSA (40h/week): overtime after 40 hours a week at 1.5×.
Make sure it is ticked and click Apply recommended policy. If you have no default overtime policy yet, this one becomes the default.
Adjust it if you need to
The policy now appears in the list. Click it to change thresholds, multipliers or working-time limits. See Overtime & Time Bank.
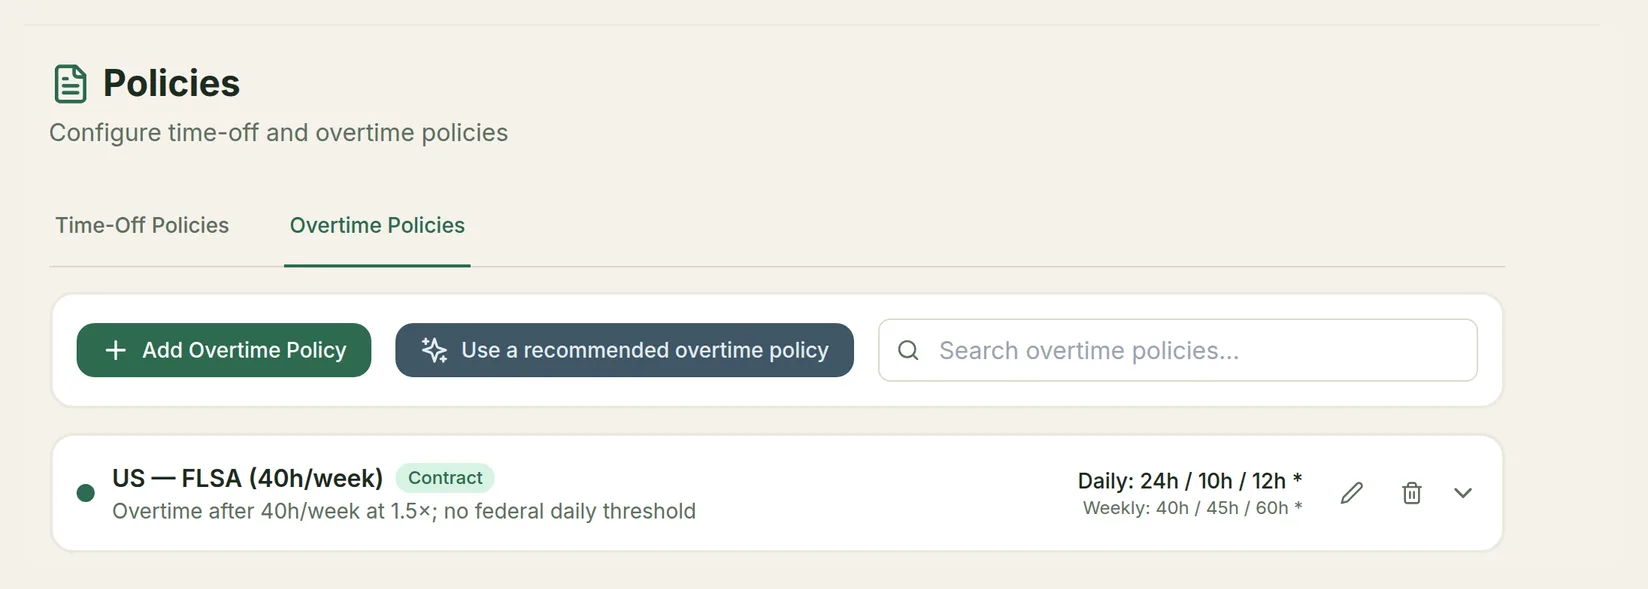
A recommended policy is the only way to set the default from the admin screens. If you build your own overtime policy from scratch, apply the recommended one first, then edit it to match.
Step 6: Add your team
There are four ways to add people. Use whichever suits you; you can mix them.
| Method | Best for | Where |
|---|---|---|
| Add your team (quick add) | A handful of people, with their team and manager in one go | Settings → Onboarding checklist → Add team members |
| Add Employee | One person with full details | People → Employees & Teams |
| Import employees | A spreadsheet of many people | People → Employees & Teams |
| Directory sync | Microsoft 365 or Google Workspace (Professional and above) | People → Employees & Teams → Sync Directory |
Quick add
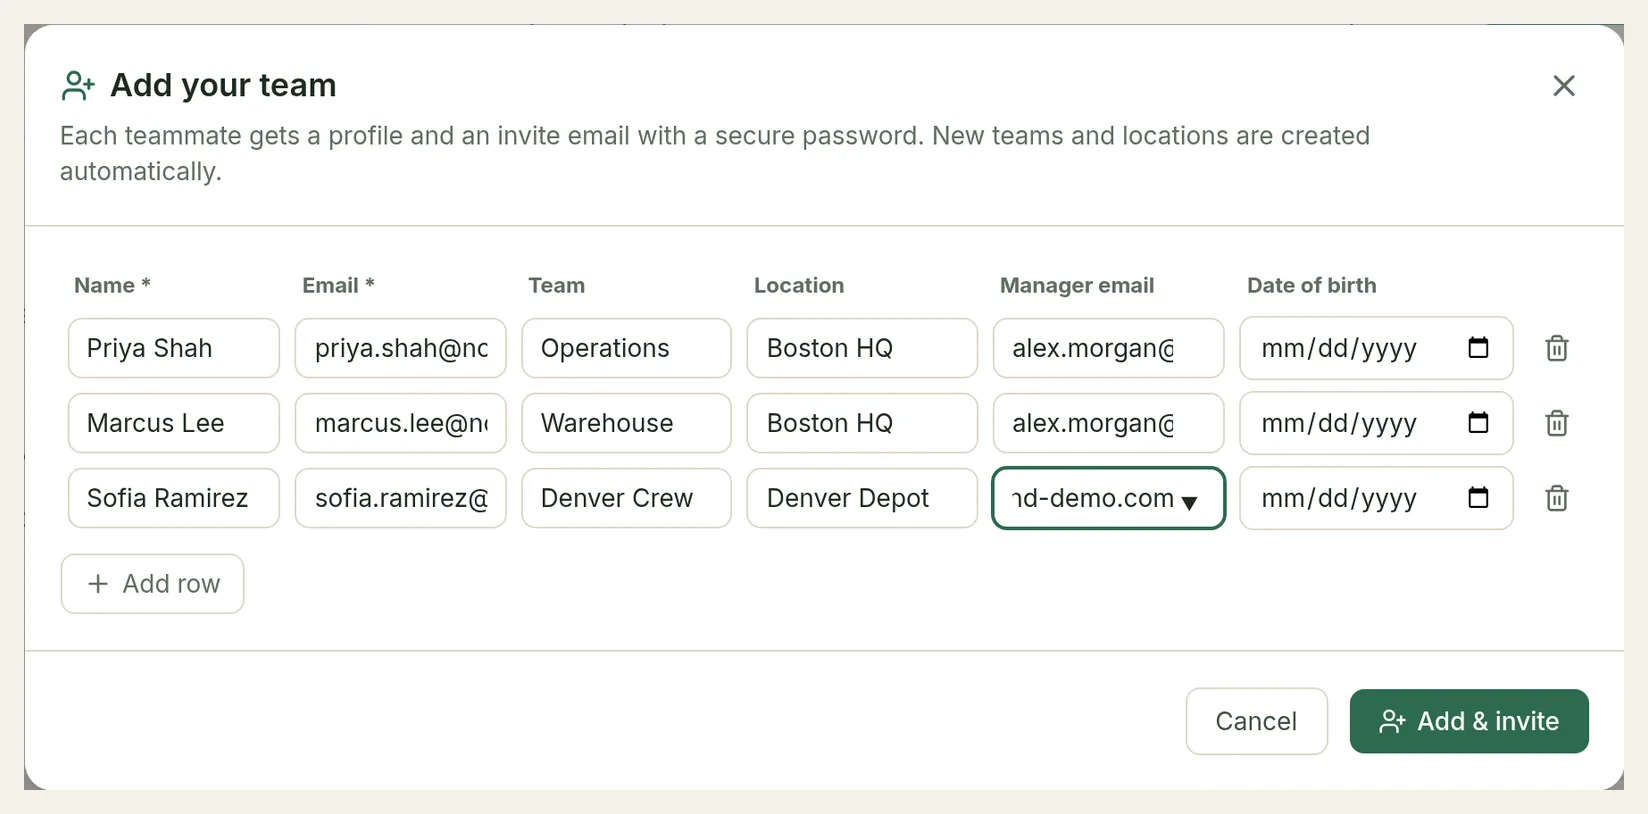
Fill in a row per person
Open Settings → Onboarding, choose See the full checklist instead if the wizard is showing, and click Add team members in Get your team logging in. For each person enter:
- Name and Email (required).
- Team — type a team name. A new name creates the team.
- Location — type a location name. A new name creates the location, in your company's jurisdiction.
- Manager email — the person's manager. They can be in another row of the same batch.
- Date of birth — required at a location whose working-time law sets stricter limits for under-18s (see below).
Click Add row for more people, then Add & invite. Each person gets a profile and an invite email straight away. Emails that already exist are skipped.
Add Employee
Create one person
Go to People → Employees & Teams and click Add Employee. Fill in Name and Email (required). As you type the email, TimeLeaf looks the person up in your connected directory, if you have one.
Password is optional:
- Type or generate a password (the wand button) and the invite email is sent as soon as you create the person, with that password in it.
- Leave it blank and nobody is emailed yet. When you send the invite later, it contains a link for the person to set their own password.
Then fill in what you know: job information (employee ID, job title, department, Location, Hire Date), employment details (start date, employment type, FTE, contract type) and personal information. Click Create Employee.
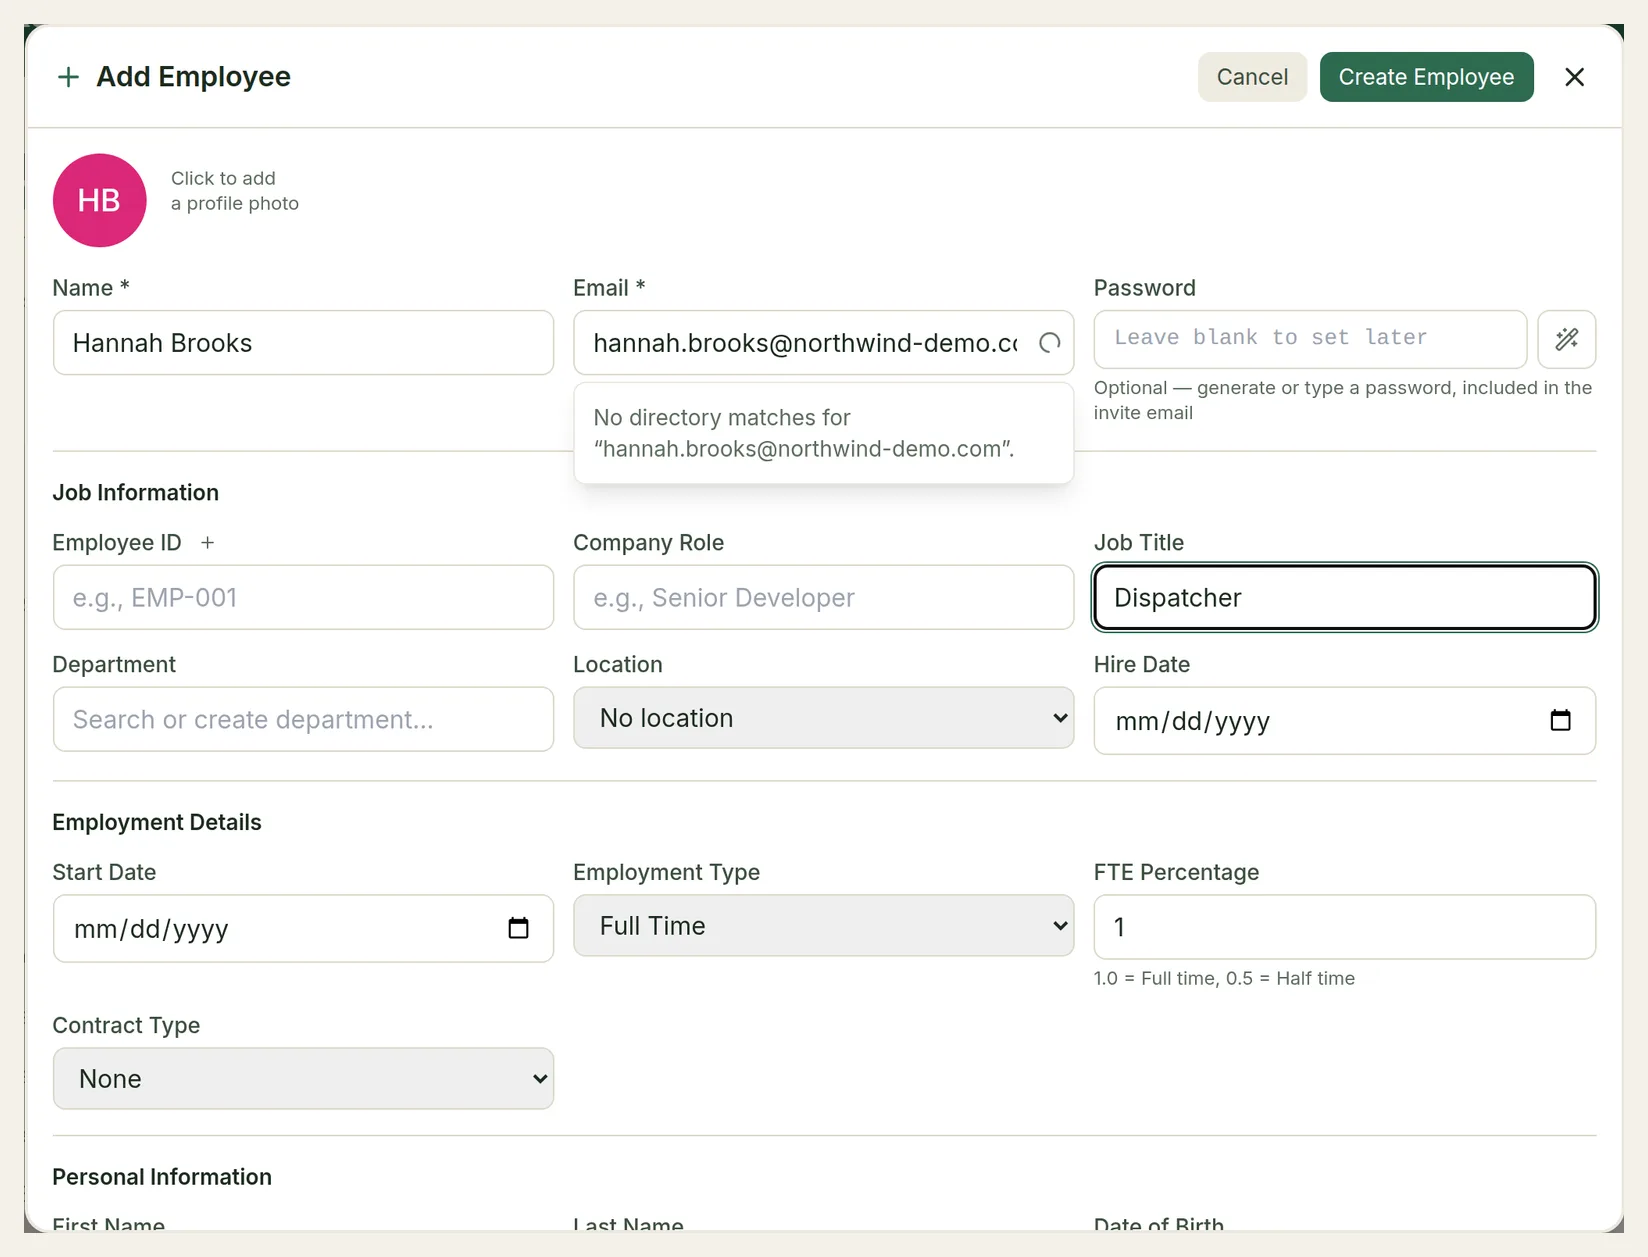
Add Employee has no team or manager field. You put people in a team, and so give them a manager, in Step 7.
Import from a spreadsheet
Upload your file
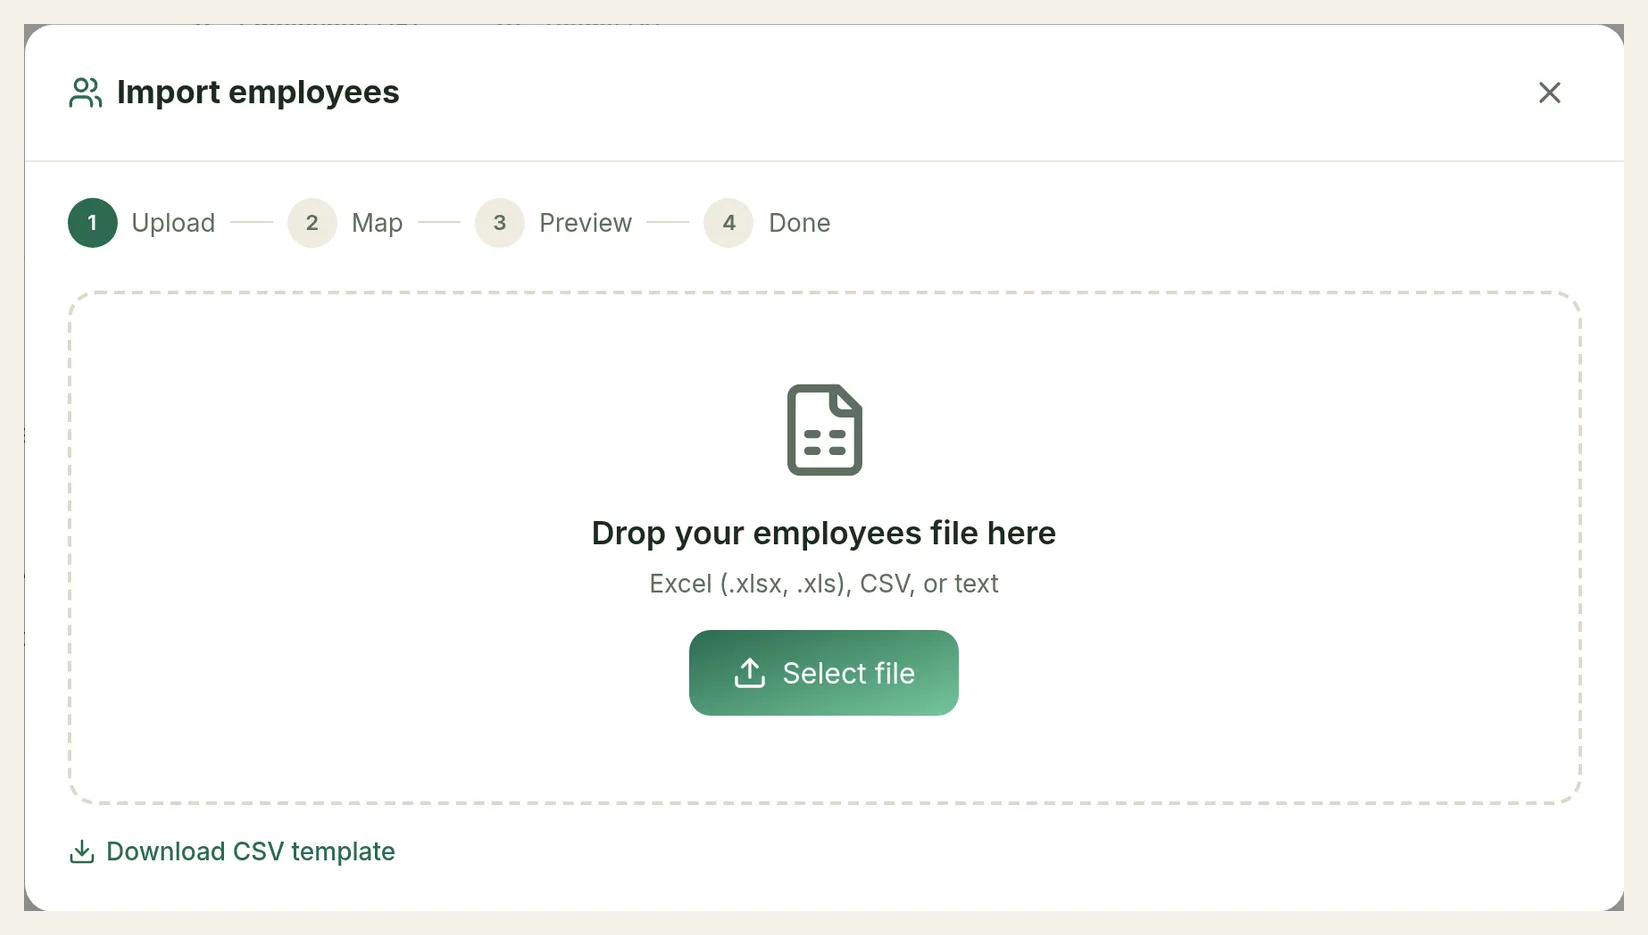
On People → Employees & Teams, click Import employees. Click Download CSV template if you want a starting file. Drop your file (Excel, CSV or text) or click Select file.
Map, preview and import
On Map, match your columns to TimeLeaf's fields. Only Full name and Work email are required. You can also map job title, department, team, manager email, location, employment type, employee ID, hire date, date of birth and country.
Preview shows which rows will be created and flags any problem rows. Existing emails are skipped, so re-running the same file is safe. Click to import, then check Done for the results.
Imported people are not emailed. Send their invites afterwards with Send Signup Links.
Directory sync
On Professional and above, once Single Sign-On is set up with Microsoft 365 or Google Workspace, Sync Directory on People → Employees & Teams imports your people and keeps them up to date. See Directory Sync.
Date of birth where young-worker rules apply. If a location is in a country whose rules limit under-18s (today the United Kingdom and Germany) and one of your overtime policies sets young-worker limits, TimeLeaf requires a date of birth for employees based there. Without one, rostering treats the person as under 18. Every add method asks for it in that case.
Seats. Each plan has an employee limit. When you reach it, new people are refused with "plan limit … reached" until you free a seat or upgrade under Settings → Billing.
Step 7: Teams and managers
Time-off requests go to the employee's manager. In TimeLeaf, a person's manager is the manager of the team they belong to. So the way to set up approvals is: make people managers, then build teams.
Give your managers the Manager role
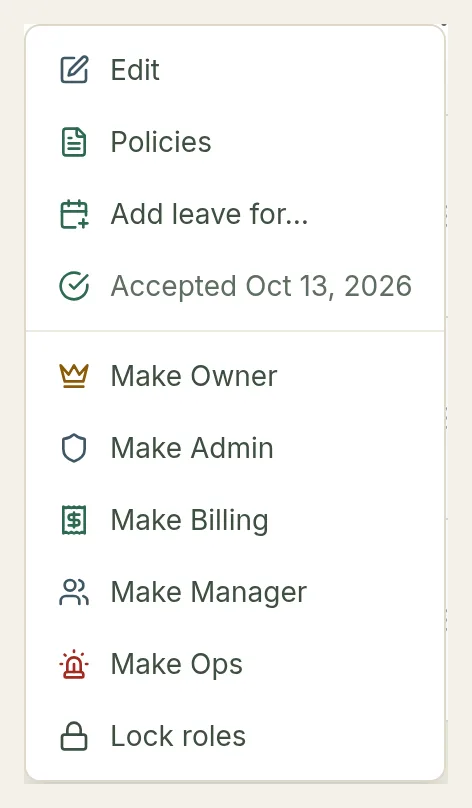
On People → Employees & Teams, open the Actions menu (⋮) on the person's row and choose Make Manager. Only people with the Manager role can be picked as a team manager.
Create a team
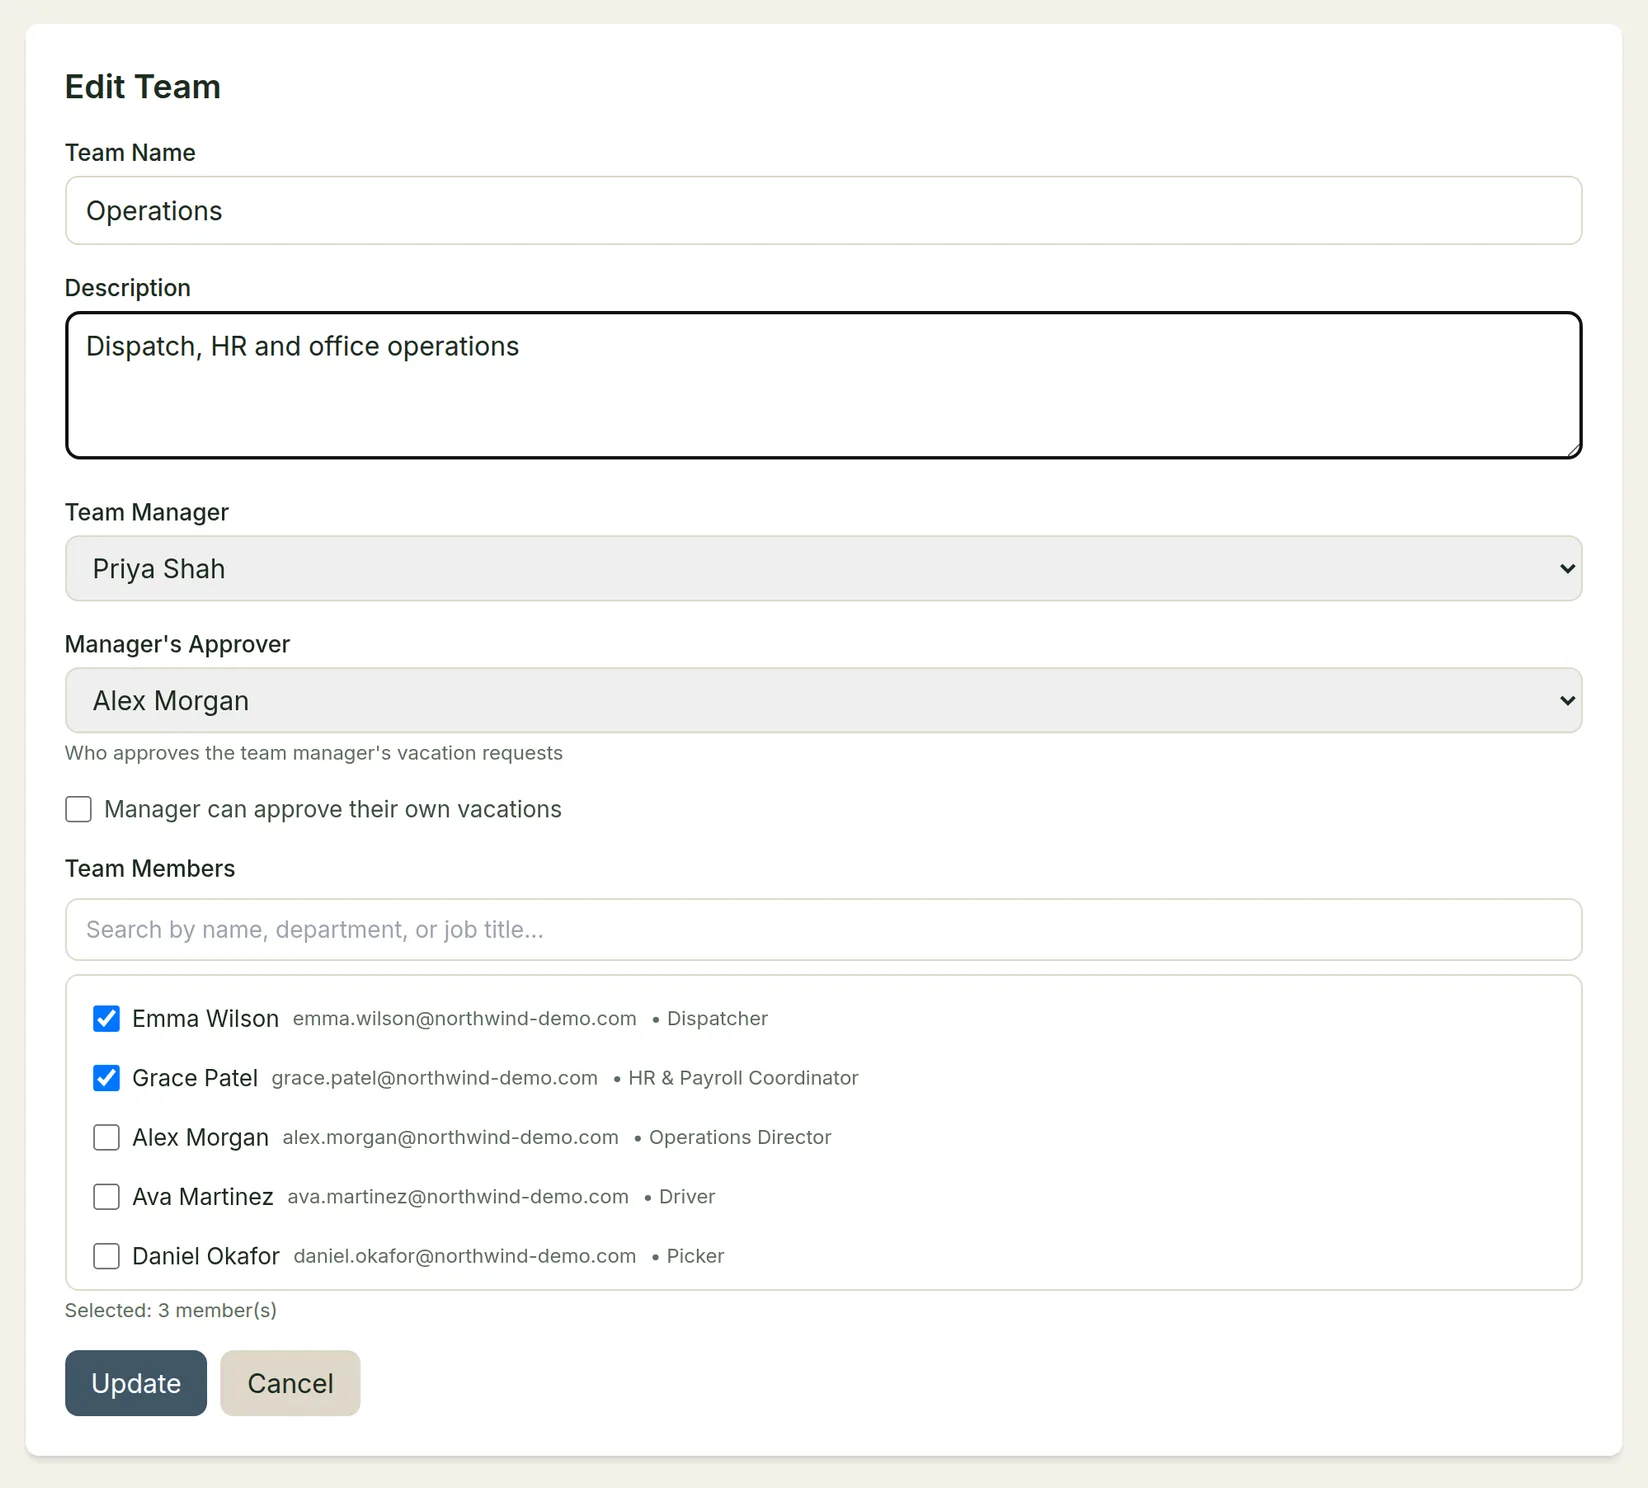
Open the Teams tab and click Add Team. Fill in:
- Team Name and Description.
- Team Manager — approves time off for everyone in the team.
- Manager's Approver — approves the team manager's own requests. Usually their boss.
- Manager can approve their own vacations — leave this off unless the manager has nobody above them.
- Team Members — tick everyone in the team. Saving sets the team manager as each member's manager.
Click Create (or Update when editing).
Check the result
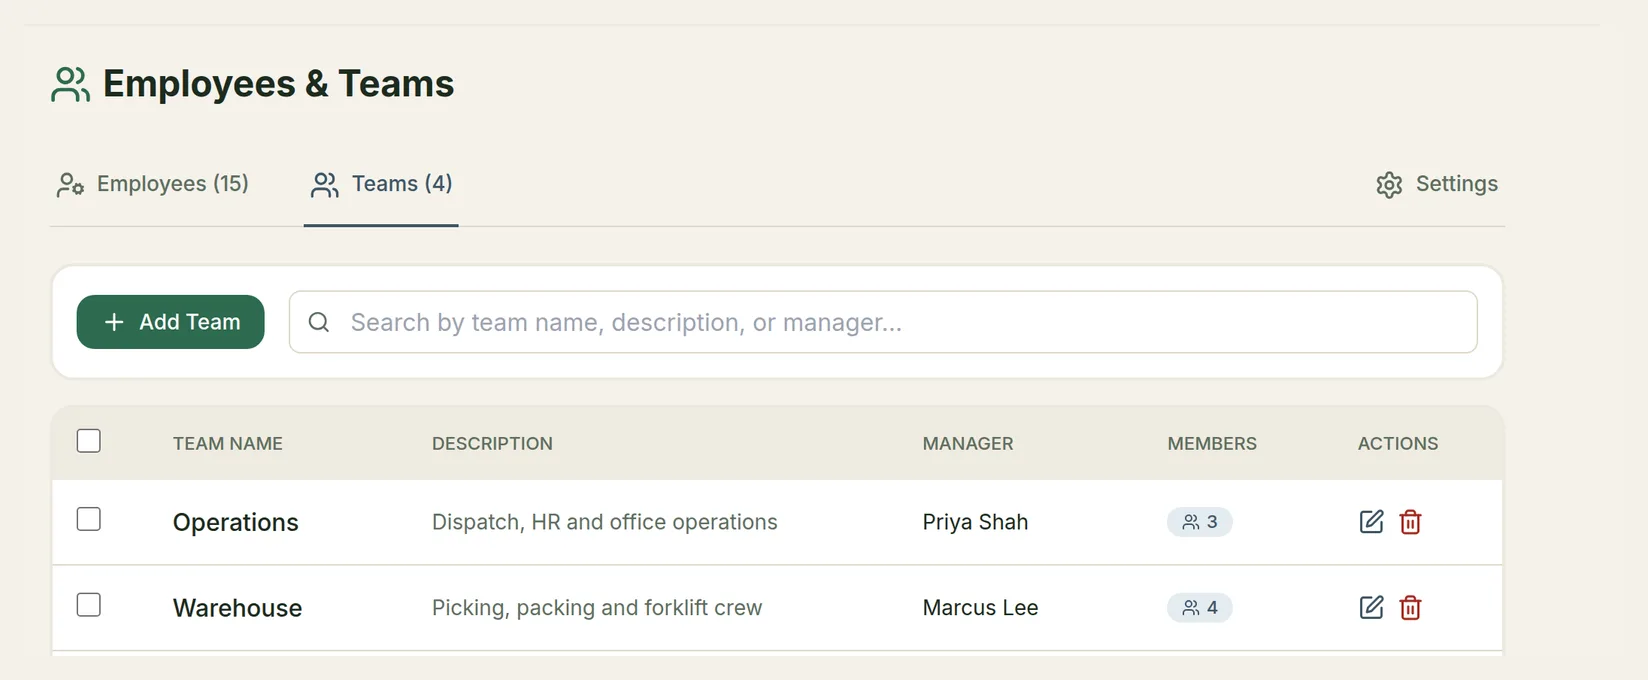
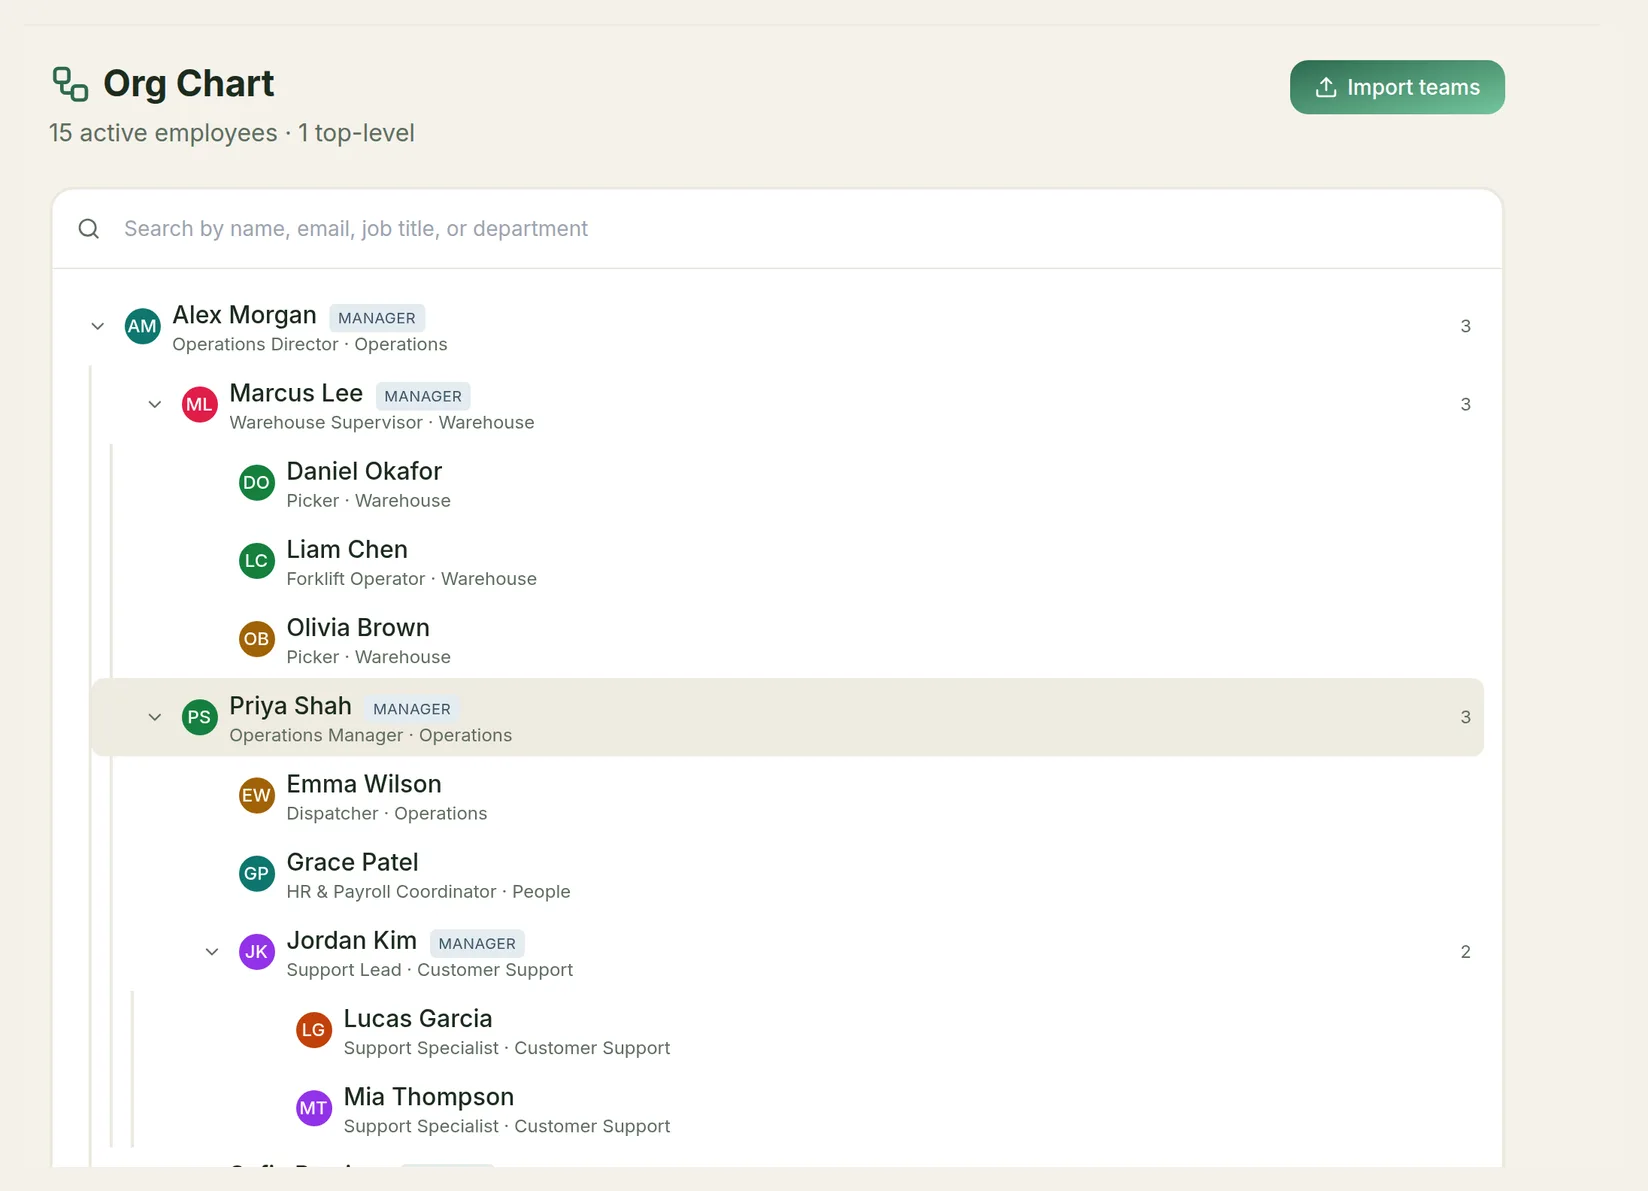
The Teams tab lists each team with its manager and member count. People → Org Chart shows the whole reporting line.
What if someone has no manager? Their requests go to the people you name under Time off → Approval Delegation → Standing escalation (a fallback approver, an HR manager, a CEO). If none of those is set, any admin can approve. Admins and owners can always decide any request.
Step 8: Assign time-off policies
A policy gives nobody a balance until it is assigned. This is a go-live requirement.
Select everyone and open Assign Policy
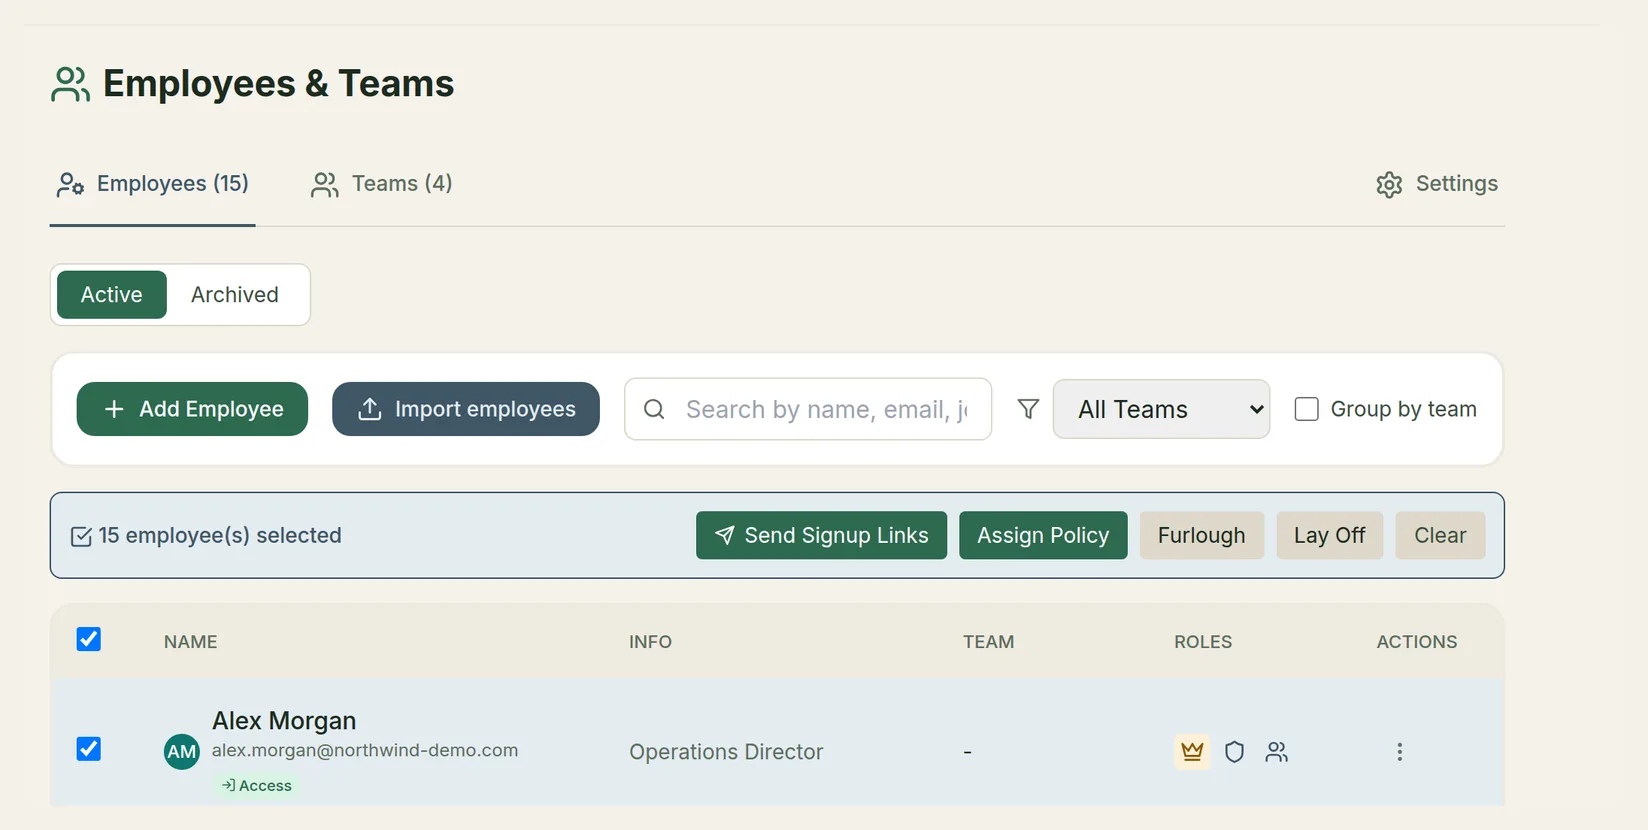
On People → Employees & Teams, tick the box in the table header to select everyone (or tick individual people). The bulk action bar appears. Click Assign Policy.
Assign each policy
In Bulk Assign Policy, click Assign next to each policy the selected people should have. Repeat for each group that needs different policies.
To change one person's policies, open their row's Actions menu and choose Policies. To move people from one policy to another of the same leave type mid-year without losing their balance, use Switch from… in the same dialog — see Leave Policies.
Opening balances
If people bring leave from a previous system, enter it as a starting balance. Open the person's row menu, choose Edit, expand Leave balances, pick the policy, choose Add or deduct, enter the amount and a reason (for example "Opening balance"), and click Adjust balance. To bring in past leave requests themselves, use Import leave history on Settings → Backups & Data.
Step 9: Invite your team
People can't sign in until they have an invite.
Send signup links
On People → Employees & Teams, select the people to invite and click Send Signup Links. Or, on Settings → Onboarding, click Send signup links in Get your team logging in to invite everyone who hasn't had a link yet.
A summary shows how many links were sent and who was skipped — for example people who are Already active or Already invited.
Follow up
Each person's row menu shows their invite status: Sent with the date, Expired (links last 7 days), or Accepted once they have signed in. Choose Resend Invite for anyone who needs a fresh link.
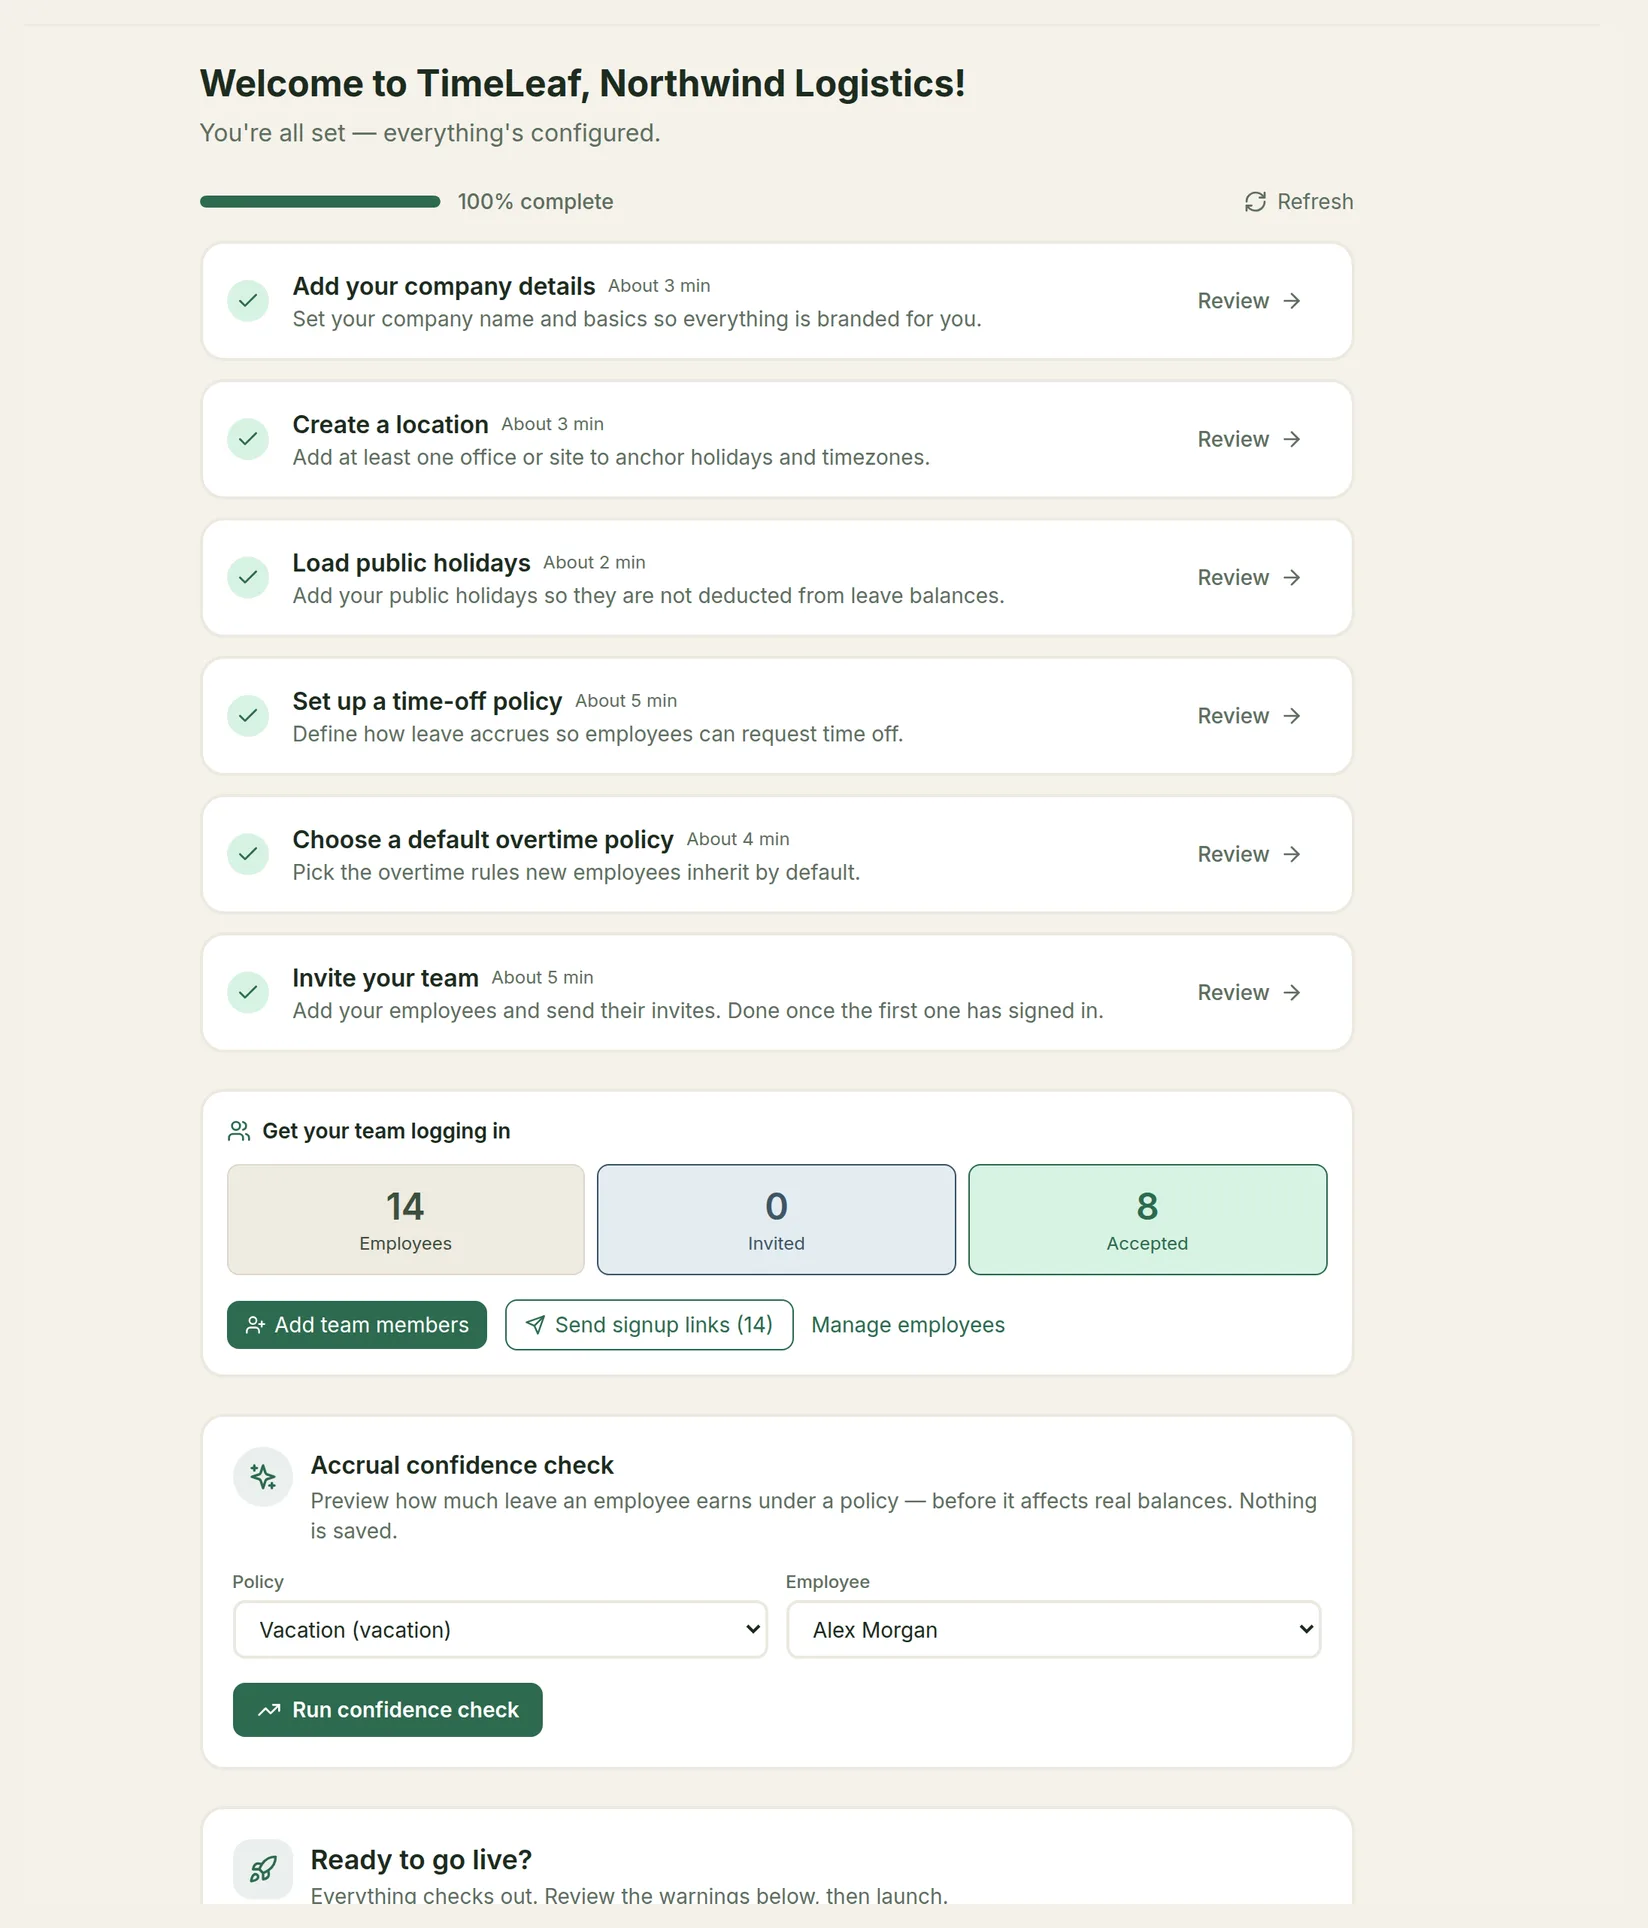
The onboarding checklist counts Employees, Invited and Accepted. The Invite your team step is done once the first employee has signed in. Send your employees to Your First Sign-In and your managers to Approve Time Off.
Step 10: Check accruals and go live
Open Settings → Onboarding. If the wizard is showing, click See the full checklist instead: the checklist view has the accrual check, the go-live check and sample data below the steps. (The wizard's last step, Go live, has the go-live check only.)
Run the accrual confidence check
In Accrual confidence check, pick a Policy and an Employee (or a sample employee) and click Run confidence check. TimeLeaf previews how much leave that person will earn, their starting balance, annual entitlement and effective rate, and warns you if something looks off. Nothing is saved, so try as many combinations as you like.
Clear the go-live check
Ready to go live? runs these checks. Red ones block the launch; yellow ones are warnings:
- Company name is set
- Company timezone is set
- Jurisdiction is selected
- At least one employee added
- A time-off policy exists
- A time-off policy is assigned
- Default overtime policy is set
- No circular reporting lines
- No broken manager references (warning only)
Each failed check has a Fix link to the page that fixes it. After fixing, click Re-check.
Go live
When nothing is blocking, click Go live. You'll see a confirmation with links to invite the rest of your team and review approvals.
Trying it out first: sample data
Below the checklist, the Sample data card loads a small, clearly labelled demo set: three demo employees, a demo team, a demo location, and your jurisdiction's recommended leave and overtime policies, all named with "[Demo]". Demo employees use a fake email domain and are never emailed.
Click Load sample data, then Confirm load. When you're done exploring, click Clear sample data, then Confirm clear. Only the demo rows are deleted; your real data is untouched.
Clear sample data before you go live. The demo location and policies count towards your setup steps, so a checklist that looks complete may only be complete because of the demo data.
Settings worth reviewing before launch
On Settings → Working Time:
- Default Work Hours/Day, Workday Starts / Workday Ends — the company's working day.
- Short-Notice Leave — whether a booking with less than the policy's Min Notice Days is allowed and flagged to the approver, or refused.
- Chase Pending Leave Requests After — hours before an undecided request is escalated to the next approver up.
- HR Email for Leave Copies — the address for policies with Copy HR on leave events ticked.
See Settings for every option.
Optional next steps
Approval Workflows
Add a second approval step, or route a leave type to HR
Blackouts & Closures
Block busy periods and deduct shutdown days
Team Calendar & Calendar Sync
Who's off, holidays, and Outlook or Google calendars
Slack
Notifications and one-click approvals in Slack
Microsoft 365 & Teams
Teams notifications, Outlook calendars and SSO
Single Sign-On
Let people sign in with Microsoft or Google
Security Settings
Require two-factor for admins, limit session length
Employees & Teams
Everything about managing people day to day